Is your spin mop not cleaning as well as it used to? A worn-out mop head can make your floors look dull and leave behind dirt instead of picking it up.
Replacing your spin mop head is easier than you think, and doing it right can save you time and effort during cleaning. In this guide, you’ll learn simple steps to swap out your old mop head quickly, so your floors get the fresh shine they deserve.
Keep reading to discover how to bring your spin mop back to life!

Credit: www.youtube.com
When To Replace Mop Head
Knowing when to replace a spin mop head keeps cleaning effective and easy. Using a worn mop head can leave floors dirty or streaky. Changing it on time saves effort and keeps your home fresh.
Signs Of Wear And Tear
Look for frayed or torn fibers on the mop head. If the mop no longer picks up dirt well, it needs replacement. A bad smell that won’t go away after washing is a sign too. Stiff or hard fibers mean the mop head is worn out.
Frequency Of Replacement
Replace the mop head every two to three months for regular use. Heavy use may require changing it more often. Always check the condition after cleaning tough messes. Regular replacement keeps the mop working at its best.

Credit: cairocommunity.com
Tools Needed For Replacement
Replacing a spin mop head is simple with the right tools. Having everything ready saves time and effort. This section lists the tools needed to make the process smooth and quick.
Essential Items
A new spin mop head is the most important item. Make sure it fits your mop model. A pair of gloves protects your hands from dirt and cleaning chemicals. A clean cloth helps wipe off any dust or residue on the mop handle. Some mop heads require a screwdriver to remove old parts. Check your mop to see if this tool is necessary.
Optional Accessories
A small bucket of warm water helps clean the mop handle before attaching the new head. A pair of scissors can cut loose threads or packaging. A towel nearby can dry any spilled water during the swap. These extras are not required but make the job easier and neater.
Removing The Old Mop Head
Removing the old mop head is the first step in replacing your spin mop. This step keeps your mop clean and working well. A clean mop base helps the new mop head last longer. Follow the simple steps below to remove the old mop head carefully and prepare the mop base for the new one.
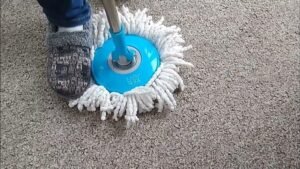
Detaching The Mop Head
Place the mop on a flat surface. Hold the mop handle firmly. Press the release button or twist the mop head. Pull the mop head away from the base gently. Avoid using too much force to prevent damage. Check if the mop head comes off easily. If stuck, try pressing the button again.
Cleaning The Mop Base
After removing the mop head, clean the mop base. Use a damp cloth to wipe dirt and dust. Remove any fibers stuck to the base. Dry the mop base with a clean towel. Keeping the base clean improves mop performance. It also helps the new mop head attach firmly.
Credit: www.bulbhead.com
Choosing The Right Replacement Head
Choosing the right replacement head for your spin mop is important. It helps your mop clean well and last longer. Picking a head that fits your mop and suits your floor type makes cleaning easier. This section explains how to select the best replacement mop head for your needs.
Compatibility Tips
Check the size of your current mop head. Replacement heads come in different sizes. Match the size to avoid loose or tight fits. Look for the model number on your mop handle. It helps find the exact replacement. Some mop heads fit many models. Read product descriptions carefully before buying. A proper fit keeps the mop stable and works well.
Material Options
Mop heads come in different materials. Cotton heads absorb water and clean well. They work best on smooth floors. Microfiber heads pick up dust and dirt easily. They dry quickly and resist stains. Some heads have sponge or synthetic fibers. These are good for scrubbing tough spots. Choose a material based on your floor and cleaning needs. Replace heads regularly for the best results.
Attaching The New Mop Head
Attaching the new mop head is a simple step that completes the replacement process. This step ensures the mop works well and cleans effectively. Follow the instructions carefully to attach the mop head securely.
Aligning The Mop Head
Start by placing the new mop head on a flat surface. Make sure the center hole lines up with the mop’s spinning mechanism. The mop head must fit straight and not tilted. Proper alignment helps the mop spin smoothly and last longer.
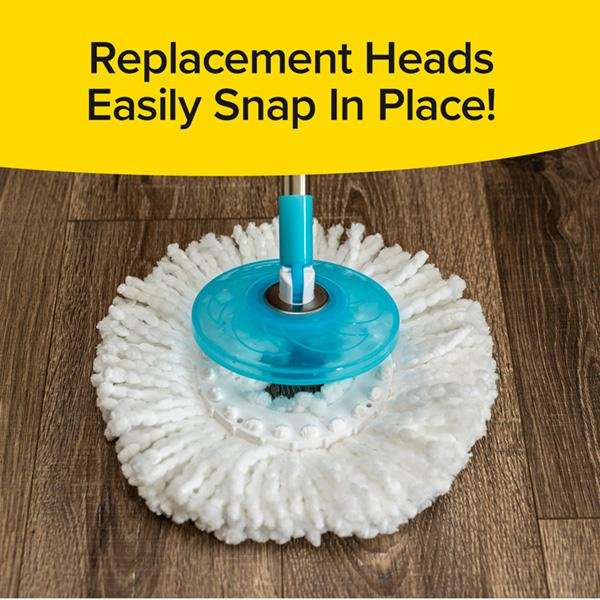
Securing The Attachment
Press the mop handle down firmly onto the mop head. You should hear a click or feel it lock into place. Check that the mop head does not wiggle or come loose. A tight fit keeps the mop head stable during use and prevents it from falling off.
Maintaining Your Spin Mop
Maintaining your spin mop helps it last longer and work better. Regular care keeps the mop head clean and fresh. It prevents bad smells and dirt build-up. Simple steps after each use can save time and effort.
Cleaning After Use
Rinse the mop head with clean water after mopping. Squeeze out extra water to remove dirt and dust. If needed, wash the mop head with mild soap. Avoid harsh chemicals that can damage the fabric. Let the mop head dry completely before storing.
Storage Tips
Store the spin mop in a dry place away from sunlight. Hang the mop to keep the head off the floor. Avoid leaving the mop in water or damp areas. Proper storage prevents mold and bad odors. Keep the mop handle and bucket clean and dry too.
Troubleshooting Common Issues
Troubleshooting common issues with your spin mop helps keep cleaning easy and fast. Some problems may stop your mop from working well. Fixing these issues saves time and effort. Here are two common problems and how to solve them.
Loose Mop Head
A loose mop head makes cleaning difficult. It may fall off during use. Check if the mop head is properly attached. Press the mop head firmly onto the base. Twist it to lock it in place if your model requires it. Dirt and debris can stop the mop head from locking. Clean the connection area before attaching the mop head again. Replace the mop head if it is worn out or damaged.
Spin Mechanism Problems
The spin function is key to drying the mop head quickly. If it does not spin, check the pedal or handle mechanism. Make sure nothing blocks the spinning basket. Dirt or hair can jam the parts. Clean the basket and spinning parts with a cloth. Test the spin action by pressing the pedal or spinning the handle. If the problem continues, the mechanism may need repair or replacement.
Frequently Asked Questions
How Do I Know When To Replace A Spin Mop Head?
Replace the spin mop head when it looks worn, frayed, or no longer cleans effectively. Regular replacement ensures better cleaning and hygiene.
What Tools Are Needed To Replace A Spin Mop Head?
Usually, no tools are needed. Most spin mop heads detach by twisting or pulling off. Check your mop’s instructions for specifics.
Can I Use Any Spin Mop Head Replacement?
It’s best to use a replacement compatible with your mop brand and model. This ensures proper fit and optimal performance.
How Often Should I Replace My Spin Mop Head?
Replace it every 3 to 6 months, depending on usage and cleaning frequency. Frequent use may require earlier replacement.
Conclusion
Replacing a spin mop head is simple and quick. Just follow the steps carefully. A fresh mop head cleans better and lasts longer. Regular replacement keeps your floors spotless and hygienic. Save time by doing it right the first time.
Keep your cleaning tools in good shape. This small task makes a big difference in your home’s cleanliness. Easy to do, easy to maintain. Give your mop a new life today.
As an Amazon Associate, I earn from qualifying purchases.