
Are you dreaming of adding a stylish and practical touch to your living space? Built-in bookshelves are the perfect way to showcase your favorite books, decor, and memories while saving space.
But you might be wondering, “Can I really build them myself? ” The good news is—you can! You’ll discover simple, step-by-step instructions that make building your own shelves easier than you think. By the end, you’ll have the confidence and know-how to create beautiful, custom built-ins that fit your room and style perfectly.
Ready to transform your walls and impress your guests? Let’s get started!
Planning Your Bookshelf
Planning your built-in bookshelf is the first step to a successful project. Careful preparation saves time and money. It helps you avoid mistakes and ensures your bookshelf fits perfectly.
Think about your needs and the room’s style. This will guide your choices for location, size, and materials. A well-planned bookshelf adds beauty and function to any space.
Choosing The Right Location
Pick a wall that is easy to access and has enough light. Avoid areas with high moisture or direct sunlight. These can damage your books and shelves over time.
Consider the room’s use. A built-in shelf in the living room might hold decorative items and books. In a home office, it could store files and supplies.
Measuring The Space
Use a tape measure to get exact height, width, and depth. Measure twice to avoid errors. Note any obstacles like electrical outlets or vents.
Think about the shelf height. Leave enough space between shelves for tall books or objects. Make sure the shelf depth fits your items without sticking out.
Selecting Materials
Choose wood or MDF for sturdy, long-lasting shelves. Pine is affordable and easy to work with. Oak or maple offers a more elegant look but costs more.
Consider paint or stain options. Paint can brighten a room. Stain shows the wood’s natural beauty. Pick finishes that match your room’s style.
Gathering Tools And Supplies
Gathering the right tools and supplies sets the foundation for building sturdy built-in bookshelves. Preparing in advance saves time and reduces frustration during the project. This step ensures you have everything needed to work safely and efficiently.
Essential Tools List
- Measuring tape to get accurate dimensions
- Level for straight and even shelves
- Power drill for making holes and driving screws
- Stud finder to locate wall supports
- Handsaw or circular saw for cutting wood
- Hammer for nails and adjustments
- Screwdriver set for fastening screws
- Clamps to hold pieces in place while assembling
- Sandpaper to smooth rough edges
- Safety goggles and gloves for protection
Recommended Materials
- High-quality plywood or solid wood panels
- Wood screws for strong joints
- Wood glue to reinforce connections
- Wood filler to cover holes and gaps
- Primer and paint or wood stain for finishing
- Trim molding for a polished look
- Brackets or supports for extra shelf strength
Preparing The Area
Preparing the area is an important first step in making built-in bookshelves. It helps create a safe, organized, and clean workspace. Taking time to prepare will make the building process smoother and protect your home.
Clearing The Space
Remove all furniture and items near the wall where you plan to build. This gives you enough room to work comfortably. Clear the floor so you can move tools and materials easily. A clean space reduces accidents and helps you stay focused.
Protecting Walls And Floors
Cover floors with drop cloths or plastic sheets to catch dust and debris. Tape the edges to keep covers in place. Use painter’s tape to protect nearby walls and trim from scratches and paint. This keeps your home safe and makes cleanup faster.
Building The Frame
Building the frame is the first important step in making built-in bookshelves. It creates the basic shape and support for the shelves. A strong frame keeps the shelves sturdy and safe for books and decorations.
Start with accurate measurements to fit the space perfectly. A good frame ensures the whole bookshelf looks neat and lasts a long time. Take your time and focus on precision during this part.
Cutting Lumber To Size
Cut lumber pieces to the exact sizes needed for the frame. Use a saw and measure twice before cutting. Straight cuts help the frame fit together well. Label each piece after cutting to avoid confusion later.
Choose wood that matches the style and strength you want. Smooth the edges with sandpaper to prevent splinters. Keep the workspace clean to stay safe and organized.
Assembling The Frame
Put the cut pieces together to form the frame shape. Use wood glue and screws for strong joints. Check that corners are square with a carpenter’s square. Tighten screws but do not overdo it to avoid wood cracks.
Work on a flat surface to keep the frame even. Double-check measurements before final assembly. Let glue dry fully for the best hold. A well-built frame supports the entire bookshelf structure.
Installing Shelves
Installing shelves is a key step in building sturdy built-in bookshelves. Proper installation ensures your shelves hold books safely and look neat. This section guides you through marking shelf positions and securing shelves properly.
Marking Shelf Positions
Start by measuring the height where each shelf will go. Use a pencil to mark these spots on the inside walls of the bookshelf frame. Keep space between shelves enough for your tallest books. Use a level to make sure marks are straight. Accurate marks help shelves sit evenly and prevent tilting.
Securing Shelves Properly
Choose strong shelf supports or brackets to hold the shelves. Attach supports firmly to the bookshelf sides using screws. Drill pilot holes first to avoid wood splitting. Place the shelf board on the supports and check for stability. Tighten screws if the shelf wobbles. Proper securing makes the shelves safe for heavy books.
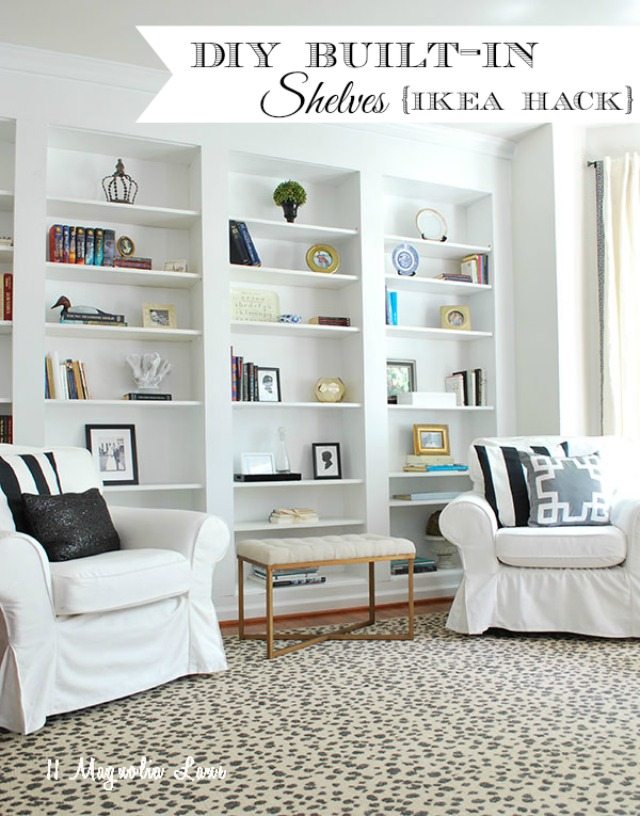
Credit: www.11magnolialane.com
Adding Finishing Touches
Adding finishing touches to your built-in bookshelves brings your project to life. It helps create a clean, polished look that fits your space well. These final steps improve durability and make your shelves stand out.
Sanding And Smoothing
Start by sanding all surfaces to remove rough spots. Use fine-grit sandpaper for a smooth finish. Sand edges and corners carefully to avoid sharp areas. Wipe away dust with a damp cloth before moving on. Smooth surfaces help paint or stain stick better and look cleaner.
Painting Or Staining
Choose paint or stain that matches your room style. Apply thin, even coats for the best result. Let each coat dry completely before applying the next. Use a brush or roller made for your chosen finish. Paint adds color and protection; stain shows wood grain and warmth.
Installing Trim
Trim adds a professional touch and hides gaps. Measure and cut trim pieces to fit shelves perfectly. Attach trim with small nails or wood glue for a secure hold. Fill nail holes with wood filler and sand smooth. A well-installed trim frames your shelves and gives a finished look.
Maintaining Your Bookshelves
Maintaining your built-in bookshelves keeps them looking fresh and lasting longer. Regular care prevents wear and tear from daily use. A clean and well-kept shelf enhances your room’s style and protects your books.
Cleaning Tips
Dust shelves often using a soft cloth or duster. Avoid wet cloths that can damage the wood. Use a mild cleaner made for wood surfaces to remove stains. Clean gently to keep the finish smooth and shiny. Remove books before cleaning to reach every corner.
Preventing Damage
Keep shelves away from direct sunlight to stop fading. Avoid placing heavy items that can bend or break shelves. Use bookends to support books and prevent leaning. Check for loose screws or nails regularly. Fix small problems early to avoid bigger damage.

Credit: southernyankeediy.com
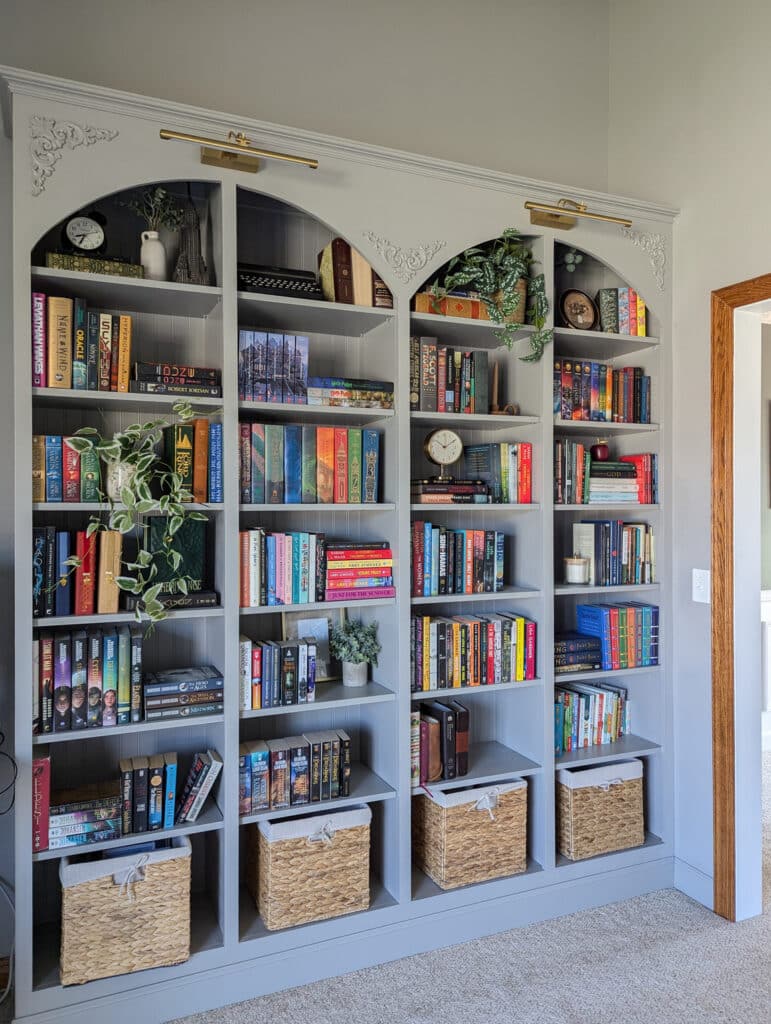
Credit: gagemadehome.com
Frequently Asked Questions
How Do I Start Building Built-in Bookshelves?
Begin by measuring your space accurately. Plan the bookshelf size and design. Gather necessary materials like wood, screws, and paint. Create a detailed cut list and prepare your tools before starting construction.
What Tools Are Needed For Built-in Bookshelves?
You need a saw, drill, level, measuring tape, screwdriver, and clamps. Sandpaper and paintbrushes are also essential. These tools help ensure precise cuts, secure assembly, and a smooth finish.
How Can I Make Built-in Bookshelves Look Professional?
Use quality wood and precise measurements. Sand all surfaces for smoothness. Apply primer and paint or stain evenly. Add trim for a polished, built-in appearance and ensure shelves are level and sturdy.
What Wood Type Is Best For Built-in Bookshelves?
Pine, oak, and maple are popular choices. Pine is affordable and easy to work with. Oak and maple are durable and provide a high-end finish. Choose wood based on your budget and desired look.
Conclusion
Building your own built-in bookshelves adds charm and function to any room. It saves money and lets you customize the space. With careful planning and basic tools, anyone can do it. Take your time and measure twice before cutting. Enjoy the process and watch your room transform.
Ready to start? Your perfect bookshelf awaits.
As an Amazon Associate, I earn from qualifying purchases.