Are you looking to add a fresh, personal touch to your home decor without spending a fortune? Making your own throw pillow covers is easier than you think—and it gives you full control over the colors, patterns, and fabrics you love.
Imagine transforming plain pillows into stylish accents that perfectly match your space. You’ll discover simple, step-by-step instructions to create beautiful throw pillow covers that fit your style and skill level. Ready to bring new life to your living room? Let’s get started!
Materials Needed
Gathering the right materials helps make sewing throw pillow covers easy and fun. Having everything ready saves time and avoids frustration. This section lists the essentials for your project.
Fabric Choices
Choose fabric that fits your style and room decor. Cotton is soft and easy to sew. Linen gives a natural look and feels cool. Canvas offers durability and works well for heavy use. Pick a fabric that feels good to touch and looks inviting.
Sewing Tools
A sewing machine speeds up the process and creates strong seams. Sharp scissors cut fabric cleanly without fraying edges. Pins hold fabric pieces together while sewing. A measuring tape ensures correct pillow size. Needles and thread match the fabric color for neat stitches.
Additional Supplies
Zippers or buttons close the pillow cover securely. Fabric chalk or markers help mark sewing lines. Iron and ironing board smooth fabric and seams. Seam ripper fixes mistakes without damaging fabric. Stuffing or pillow inserts complete the throw pillow look.

Credit: www.arloren.com
Measuring And Cutting Fabric
Measuring and cutting fabric correctly is the first step to making great throw pillow covers. It helps the cover fit the pillow snugly without being too tight or too loose. Taking time to measure and cut carefully saves fabric and avoids mistakes later.
Follow simple steps to get your fabric pieces ready. Accurate cutting makes sewing easier and gives a neat finish to your pillow cover.
Determining Pillow Size
Start by measuring your pillow’s length and width. Use a soft tape measure for accuracy. Note the exact size in inches or centimeters. This size is your base measurement.
Check if your pillow is square or rectangular. Measure both sides carefully for a perfect fit.
Adding Seam Allowance
Add extra fabric around each side for sewing seams. Usually, ½ inch (1.3 cm) is enough. This allowance lets you join fabric pieces without making the cover too small.
Mark the seam allowance clearly on your fabric before cutting. It keeps your measurements consistent.
Cutting Tips
Use sharp fabric scissors for clean cuts. Dull scissors can fray or damage fabric edges. Cut slowly along the marked lines to stay precise.
Lay your fabric flat on a hard surface. Smooth out wrinkles to avoid uneven cuts. Pin the fabric layers if cutting multiple pieces at once.
Basic Sewing Techniques
Basic sewing techniques form the foundation for making throw pillow covers. Knowing these skills helps you create neat and durable covers. These simple steps guide you through the process, even if you are new to sewing. Focus on straight stitching, seam finishing, and using a sewing machine. Each skill builds confidence and improves your results.
Straight Stitching
Straight stitching is the most common and essential stitch. It holds fabric pieces together with a clean line. Keep stitches even and close for a strong seam. Use pins to keep fabric steady before sewing. Practice on scrap fabric to get a smooth, straight line. Straight stitching gives your pillow cover a tidy look.
Seam Finishing
Seam finishing prevents fabric edges from fraying. It makes the pillow cover last longer. Fold edges inward and sew close to the fold. You can also use pinking shears to cut edges. Another option is zigzag stitching along raw edges. Clean seams give a professional finish to your work.
Using A Sewing Machine
A sewing machine speeds up the sewing process. It creates even and strong stitches. Place fabric under the needle, lower the presser foot, and sew slowly. Guide fabric gently with your hands to keep lines straight. Always test on scrap fabric to set the right stitch length. Sewing machines make pillow covers look neat and last longer.
Creating The Pillow Cover
Creating the pillow cover is an exciting step in making throw pillow covers. This part brings your fabric pieces together into a neat, functional cover. Careful sewing and finishing make the pillow look great and last long. Follow these simple steps to complete your pillow cover with ease.
Sewing The Sides
Place the fabric pieces with the right sides facing each other. Pin the edges to hold the fabric steady. Sew along the sides using a straight stitch. Leave one side open for the closure. Keep the stitches close to the edge for a clean finish. Trim the corners to reduce bulk and turn the fabric inside out.
Adding A Closure
Choose a closure type like a zipper, buttons, or an envelope flap. For zippers, sew the zipper tape along the open edge carefully. For buttons, sew buttonholes on one side and attach buttons on the other. An envelope closure needs extra fabric flaps sewn inside the opening. This closure keeps the pillow inside and allows easy removal for washing.
Inserting The Pillow
Hold the pillow insert and gently push it into the cover. Adjust the corners to fit the pillow snugly. Smooth out any wrinkles or lumps. Close the cover using the chosen closure method. Your pillow is ready to add comfort and style to your space.
Closure Options
Choosing the right closure for your throw pillow covers helps make them easy to use and look nice. The closure keeps the pillow inside safe and allows you to remove the cover for washing. Different closures offer different styles and levels of convenience. Here are some common closure options to consider for your DIY pillow covers.
Zipper Installation
Zippers offer a clean and secure closure for pillow covers. They keep the pillow in place and hide well along the edge. Sewing a zipper can be easy with a zipper foot on your machine. Choose a zipper color that matches your fabric for a neat look. Zippers last long and make washing simple.
Button Closures
Buttons add a charming and classic touch to pillow covers. You can sew buttons on one side and make small buttonholes on the other. Buttons come in many styles and colors to match your fabric. This closure is easy to use but may not be as tight as zippers. Buttons give a handmade, cozy feel to your pillows.
Envelope Style
The envelope style uses fabric flaps that overlap on the back. This design needs no extra closures like zippers or buttons. It is quick to sew and easy to open. The flaps keep the pillow secure while allowing simple removal. Envelope covers have a soft, casual look perfect for many rooms.
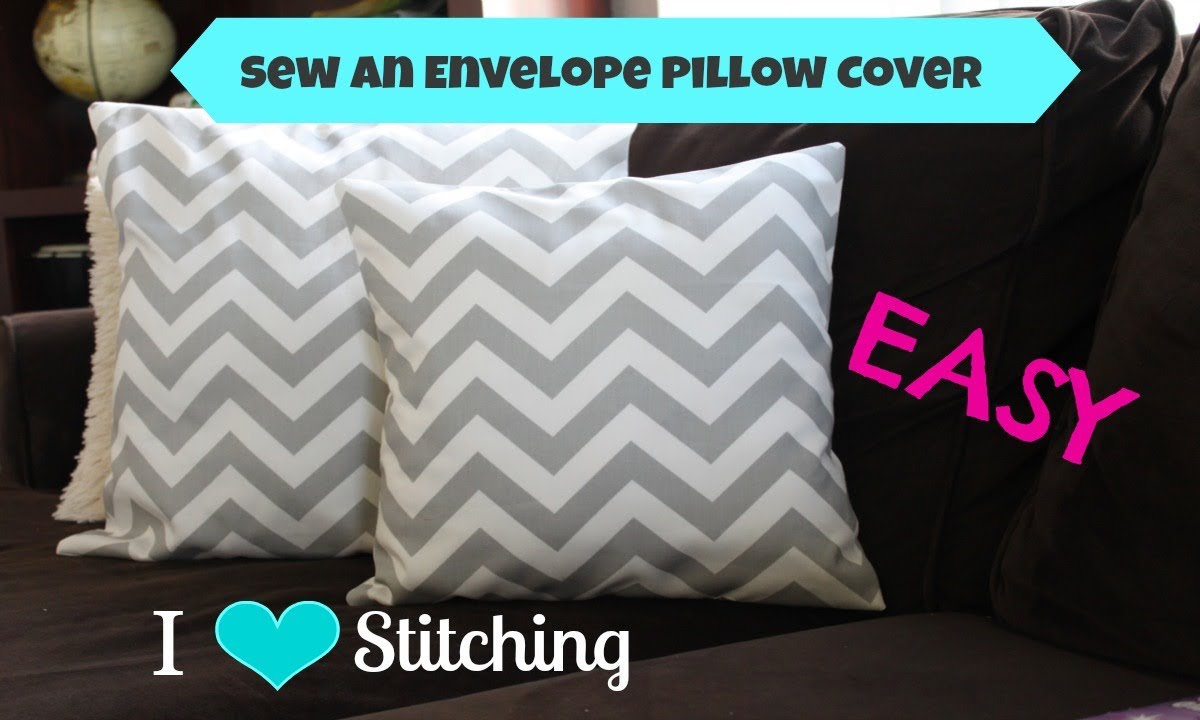
Credit: www.youtube.com
Customizing Your Covers
Customizing your throw pillow covers lets you create unique home decor. It makes your space personal and cozy. Small changes can bring big style updates. You can use different materials and techniques. This section shows easy ways to add charm to your covers.
Adding Embellishments
Embellishments add texture and interest. Sew on buttons, beads, or lace for detail. Use ribbons or trims to frame edges. Glue small decorations for quick changes. These little touches make covers stand out. They give a hand-crafted look without much effort.
Using Fabric Paint
Fabric paint lets you create patterns and designs. Use stencils for neat shapes and letters. Freehand painting adds a personal touch. Choose bright colors to brighten dull covers. Make sure the paint is dry before use. This method is fun and cost-effective for customization.
Mixing Patterns And Textures
Combine different fabrics to add depth. Try smooth cotton with rough burlap or velvet. Mix stripes with florals for a lively look. Keep colors in the same family for balance. Play with size and scale of patterns. This mix creates visual interest and warmth.
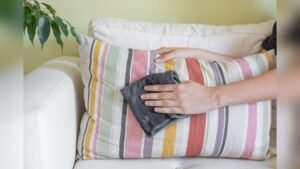
Care And Maintenance
Throw pillow covers add style and comfort to any room. Taking good care of them keeps their look fresh and bright. Simple steps help your pillow covers last longer and stay clean.
Washing Instructions
Check the fabric type before washing. Use cold water for most materials to avoid shrinking. Choose a gentle cycle on your washing machine. Use mild detergent to protect colors and fabric. Air dry pillow covers to prevent damage from heat. Avoid using bleach or harsh chemicals.
Stain Removal Tips
Act fast to remove stains. Blot the stain with a clean cloth to absorb liquids. Use a mild soap solution for spot cleaning. Test the cleaner on a small area first. Avoid rubbing hard; it can damage the fabric. Repeat cleaning if needed and let air dry.
Storage Suggestions
Store pillow covers in a cool, dry place. Fold them neatly to avoid wrinkles. Keep covers away from direct sunlight to prevent fading. Use breathable storage bags to protect from dust. Avoid plastic bags that trap moisture and cause mold.

Credit: www.enjoytheviewblog.com
Frequently Asked Questions
What Materials Do I Need For Throw Pillow Covers?
You need fabric, scissors, a sewing machine or needle, thread, pins, and a zipper or buttons. Choose durable, washable fabric for easy maintenance.
How Do I Measure Pillows For Covers?
Measure the pillow’s width and height accurately. Add an extra inch for seam allowance. This ensures a snug, well-fitting cover.
Can I Make Throw Pillow Covers Without Sewing?
Yes, use fabric glue or iron-on adhesive for no-sew covers. These methods save time but may be less durable than sewing.
How Do I Add A Zipper To Pillow Covers?
Place the zipper face down on the fabric edge. Sew carefully along the zipper tape for easy removal and washing.
Conclusion
Making throw pillow covers can be simple and fun. Choose fabric you like and follow easy steps. Sewing your own covers saves money and lets you customize colors and patterns. Try different styles to match your room’s look. Small projects like this bring joy and creativity to your home.
Start with basic designs and improve with practice. Enjoy the process and make your space cozier with handmade pillow covers.
As an Amazon Associate, I earn from qualifying purchases.