Are you ready to add a personal touch to your living space? Building your own end table is easier than you think—and it can save you money while giving you exactly the style you want.
Imagine having a unique piece that fits perfectly next to your couch or bed, made by your own hands. In this guide, you’ll discover simple steps and practical tips that anyone can follow, even if you’ve never worked with wood before.
Keep reading, and by the end, you’ll be proud to say, “I built that!”
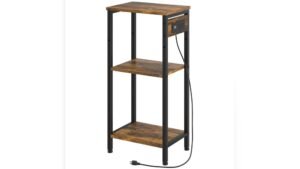
Choosing Materials
Choosing the right materials is the first step in building a sturdy end table. The materials affect the table’s look, strength, and durability. Picking quality items makes the building process smoother and the final product better. Focus on wood, tools, and hardware before starting your project.
Selecting Wood Types
Wood choice sets the style and strength of your end table. Pine is affordable and easy to work with. Oak is strong and has a beautiful grain. Maple is hard and smooth, perfect for a polished look. Choose wood that fits your budget and design taste. Check for straight boards with few knots to avoid weak spots.
Picking The Right Tools
Good tools make your work faster and easier. A saw is needed to cut wood to size. Use a drill for screws and holes. Sandpaper smooths rough edges. A measuring tape ensures precise cuts. Clamps hold pieces steady while gluing or screwing. Basic tools are enough for a simple end table.
Gathering Hardware
Hardware holds your table together and adds detail. Screws and nails are essential for joining parts. Wood glue strengthens connections. Consider corner brackets for extra support. Choose hardware that matches your wood color or finish. Keep all items handy before you start building.

Credit: www.etsy.com
Planning Your Design
Planning your design is the first step to build a strong, useful end table. Good planning helps avoid mistakes and saves time. It shapes how your table will look and fit in your space. Taking time to plan makes the project smooth and enjoyable.
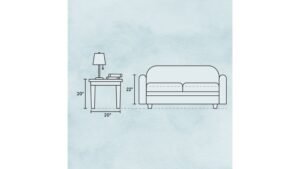
Measuring Dimensions
Start by measuring the space where the table will go. Note the height, width, and depth you want. Standard end tables are about 22 to 26 inches tall. Make sure the size fits your room and furniture. Accurate measurements help you buy the right materials and avoid waste.
Sketching The Layout
Draw a simple sketch of your table design. Show the top, sides, and legs. Label the measurements clearly on the sketch. Use a pencil and paper or a drawing app. This visual guide keeps your work organized. It also helps spot any design problems early.
Deciding On Style
Choose a style that matches your room and taste. Classic, modern, rustic, or minimalist styles work well. Think about the shape of the legs and the table top. Pick a finish or paint color that fits your décor. Style decisions give your table personality and charm.
Cutting The Pieces
Cutting the pieces is the first big step in building your end table. You need to cut the wood accurately to make sure all parts fit well. This stage sets the foundation for the whole project. Take your time and follow the steps carefully. Safety and precision are important here.
Marking The Wood
Start by measuring each piece of wood carefully. Use a pencil to draw clear lines where you will cut. Double-check your measurements before marking. Straight, visible lines help guide your saw. Mark all pieces before cutting to stay organized.
Using A Saw Safely
Choose the right saw for your wood type and thickness. Hold the saw firmly and cut slowly along the marked line. Wear safety glasses to protect your eyes. Keep your fingers away from the blade at all times. Work in a clean area to avoid accidents.
Sanding Edges
After cutting, sand the edges to make them smooth. Use fine-grit sandpaper for best results. Sand along the grain of the wood. Check for rough spots and smooth them out. Clean the dust before moving to the next step.
Credit: www.woodshopdiaries.com
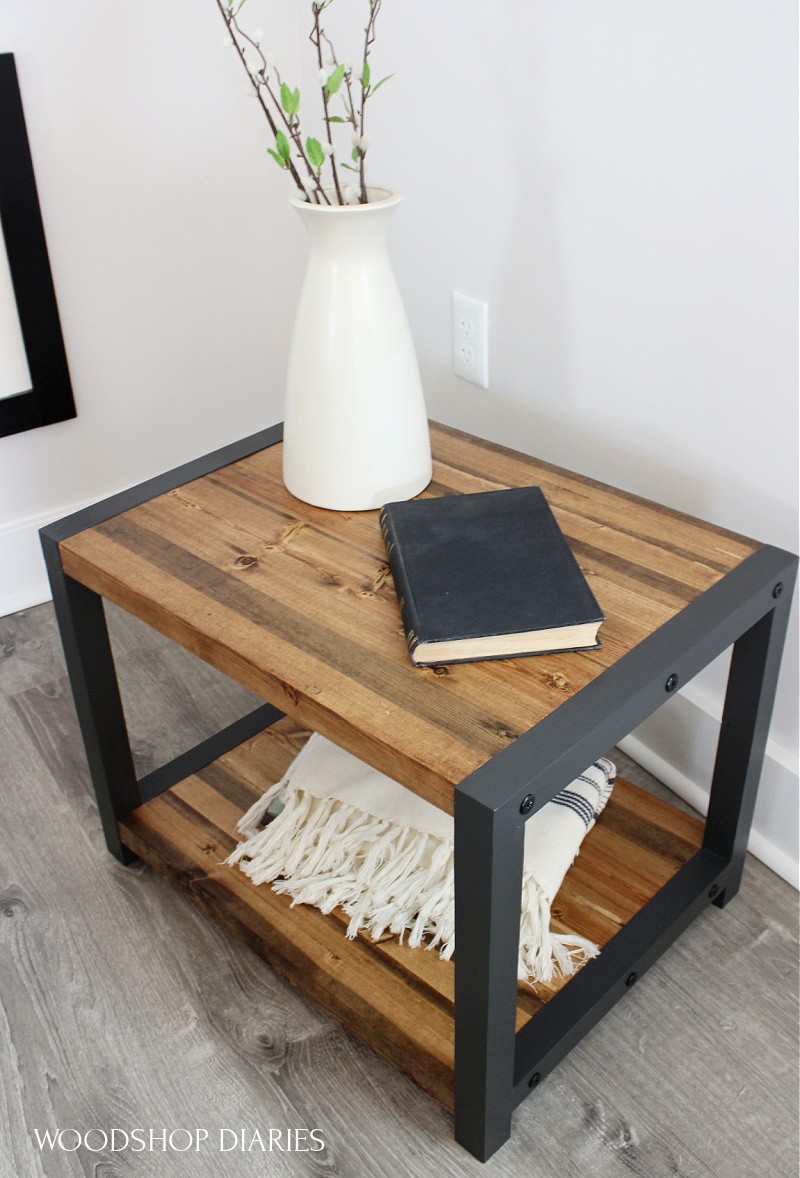
Assembling The Table
Assembling the table is the step where your project starts to take shape. This part involves connecting the legs and the top securely. Each step ensures the table stands firm and looks good. Follow the instructions carefully for a strong and stable end table.
Joining Legs And Top
Place the table top upside down on a soft surface. Align the legs at each corner of the table top. Check that all legs fit flush against the underside. Use clamps or have someone hold the legs in place. This keeps the legs steady for the next step.
Securing With Screws
Use screws to attach the legs to the top. Pre-drill holes to avoid splitting the wood. Drive screws slowly and firmly into each leg. Make sure the screws go in straight. Tighten until the legs feel secure but do not over-tighten.
Adding Support Braces
Attach support braces between the legs for extra strength. Position braces diagonally or horizontally, depending on your design. Secure them with screws or wood glue. Braces prevent wobbling and add durability. Double-check all connections before finishing.
Finishing Touches
Finishing touches give your end table a polished look. They protect the wood and make the table last longer. Small details make a big difference in the final result.
Take your time with these steps. They help your project look professional and feel smooth to touch.
Applying Stain Or Paint
Choose a stain or paint that matches your room style. Stain shows the wood grain and adds warmth. Paint covers the wood and adds color. Use a brush or cloth for even coating. Apply thin layers and let each dry before the next. This avoids drips and uneven color. Test the stain or paint on a scrap piece first. It helps you see the true color and finish.
Sealing The Surface
Seal the table with a clear finish. This protects from spills and scratches. Use polyurethane, varnish, or wax. Apply thin coats with a brush. Let each coat dry fully. Sand lightly between coats for smoothness. Sealing makes cleaning easier and keeps the table looking new.
Attaching Felt Pads
Attach felt pads to the table legs. They protect floors from scratches. Pads also make moving the table quiet and smooth. Stick the pads firmly on each leg bottom. Check they stay in place before use. Felt pads add care and thought to your finished piece.

Credit: www.youtube.com
Troubleshooting Tips
Troubles can arise while building an end table. Small problems can slow progress or affect the table’s look and strength.
Knowing some simple fixes helps keep the project on track. These tips cover common issues and how to solve them easily.
Fixing Wobbly Legs
Wobbly legs make the table unstable and unsafe. Check the screws or bolts first. Tighten any loose fasteners carefully.
If legs still wobble, add small wood shims between the leg and the floor. This evens out uneven surfaces. Use wood glue on loose joints. Clamp the legs until dry for a solid hold.
Dealing With Imperfections
Scratches or dents happen during cutting or sanding. Sand these areas gently with fine-grit sandpaper. This smooths out rough spots without damaging the wood.
Fill deeper holes or cracks with wood filler. Let it dry completely. Sand again for an even finish. Paint or stain the table to hide any marks.
Maintaining Your Table
Clean your table regularly using a soft, dry cloth. Avoid harsh chemicals that can damage the finish. Use coasters to prevent water rings and heat marks.
Check the legs and joints every few months. Tighten screws if needed. This keeps the table sturdy and extends its life.
Frequently Asked Questions
What Materials Are Best For Building An End Table?
Wood like oak, pine, or plywood is ideal for end tables. These materials offer durability, ease of use, and a clean finish. Choose quality wood to ensure your table lasts and matches your home decor. Avoid soft or fragile woods for stability.
How Long Does It Take To Build An End Table?
Building an end table typically takes 4 to 6 hours. This includes measuring, cutting, assembling, and finishing. Time varies based on skill level and design complexity. Beginners should allocate extra time for careful work and drying finishes.
What Tools Do I Need For Making An End Table?
Essential tools include a saw, drill, measuring tape, clamps, and sandpaper. A screwdriver and wood glue are also helpful. These tools help you cut, assemble, and finish the table efficiently and accurately for a professional look.
How Can I Ensure My End Table Is Sturdy?
Use strong joints like dowels or screws and wood glue. Choose solid wood and avoid thin or weak panels. Properly clamp and allow glue to dry fully. Reinforce legs and corners for added stability and durability.
Conclusion
Building an end table is simple and rewarding. You only need basic tools and materials. Follow each step carefully and take your time. Personalize the design to fit your style and space. This project helps you practice woodworking skills. Enjoy the satisfaction of making your own furniture.
Soon, your home will have a unique, useful piece. Start small, and build confidence for bigger projects later. Crafting your own table saves money and adds charm. Keep learning and creating. Your handmade end table will bring pride and joy.
As an Amazon Associate, I earn from qualifying purchases.