Are you looking to add a personal touch to your living space without spending a fortune? Building your own end tables might be the perfect project for you.
Imagine having stylish, unique furniture that fits your exact needs and style—made by your own hands. In this guide, you’ll discover simple steps and creative ideas to craft end tables that not only look great but also give you a sense of pride and accomplishment.
Ready to transform your home and impress your guests? Let’s dive in and make your DIY end tables a reality.
Choosing Materials
Choosing the right materials shapes the look and feel of your DIY end table. Your choice affects durability, style, and cost. Picking materials that match your skills and tools makes the project easier. This section explores common materials and their benefits for your project.
Wood Types And Benefits
Wood is the most popular material for end tables. Pine is soft, easy to cut, and affordable. Oak is strong and has a classic grain pattern. Maple offers a smooth finish and resists dents. Choose wood based on your budget and style. Each wood type can be stained or painted to fit your decor.
Using Reclaimed Materials
Reclaimed wood brings character and history to your table. Old pallets or barn wood often have unique marks and textures. Using reclaimed wood helps the environment by recycling materials. It may require sanding or treating to remove nails or dirt. This option adds a rustic, vintage charm to your end table.
Incorporating Metal And Glass
Metal frames add strength and modern style. Steel or iron legs work well for sturdy support. Glass tops create a sleek and light look. Tempered glass is safer and more durable for table surfaces. Combining metal and glass gives your end table a trendy, industrial vibe. These materials suit minimalist or urban decor themes.
Basic Tools Needed
Building your own end table is a fun and rewarding project. The right tools make the work easier and safer. You do not need many tools to get started. Just a few basics will help you create a sturdy and attractive table.
Essential Hand Tools
Start with simple hand tools. A measuring tape ensures accurate cuts. A carpenter’s square helps keep corners straight. Use a handsaw or a small crosscut saw for cutting wood. A hammer is needed for nails. Sandpaper smooths the edges and surfaces. A screwdriver is important for screws. These tools are easy to find and affordable.
Power Tools For Efficiency
Power tools save time and effort. A cordless drill speeds up drilling holes and driving screws. A jigsaw can cut curves and shapes quickly. A power sander smooths large surfaces fast. These tools give a professional look to your project. Use them carefully to avoid mistakes and injuries.
Safety Gear Recommendations
Safety comes first in any DIY project. Wear safety glasses to protect your eyes from dust and wood chips. Use ear protection to reduce noise from power tools. Gloves protect your hands from splinters and sharp edges. A dust mask helps keep your lungs safe from sawdust. Always work in a clean, well-lit area.
Simple End Table Designs
Simple end table designs make great DIY projects. They use few materials and need little skill. These tables fit any room and style. You can create useful, stylish pieces fast and easy. Here are three popular simple designs to try.
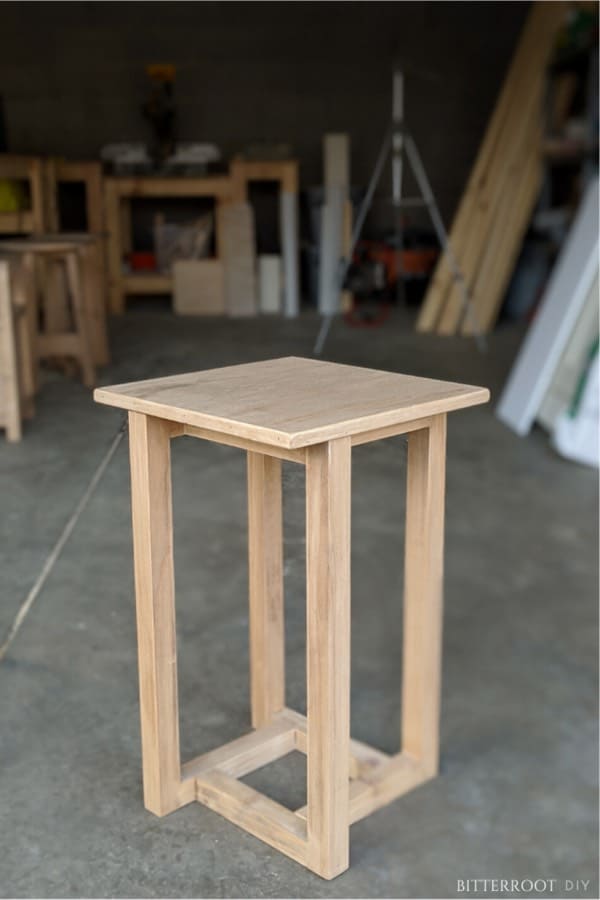
Minimalist Stool Style
This design looks like a small stool. Use wood or metal for the legs and top. Keep the shape clean and straight. Paint or stain it in soft colors for calm looks. It works well in small spaces. The minimalist style keeps your room neat and open.
Crate And Pallet Tables
Wooden crates or pallets make perfect end tables. Stack or attach them for the base and shelf. Sand the wood for smooth edges. You can paint or leave the natural wood look. Crate tables offer storage space inside. Pallet tables give a rustic, cozy feel to rooms.
Stacked Books Table
Stack old books to build a unique table. Use large, sturdy books for the base. Secure them with glue or straps for safety. Add a flat board on top for a smooth surface. This design shows personality and creativity. Change books anytime to refresh the look.

Credit: www.reddit.com
Intermediate Projects
Intermediate DIY end table projects offer a balance of challenge and creativity. They push your skills beyond basic cuts and assembly. These projects bring style and function into your living space. Expect to spend more time on details and finishing. The results often look like store-bought pieces but with a personal touch.
Mid-century Modern Style
Mid-century modern tables have clean lines and simple shapes. These tables often use tapered legs and smooth surfaces. You can create them with wood and a few tools. Painting or staining in muted tones fits this style well. This project teaches you precision and finishing skills. Your table will bring a timeless look to any room.
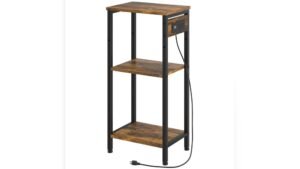
Storage-integrated Tables
Storage-integrated end tables combine function with design. They include drawers or shelves for extra storage space. Building these tables requires measuring and fitting compartments carefully. You learn how to add hinges and handles properly. This project is useful for small rooms and keeps clutter away. It makes your table practical and stylish at once.
Geometric Patterns
Geometric pattern tables catch the eye with unique designs. Use different wood shapes or painted patterns on the tabletop. Cutting and arranging pieces help improve your accuracy. This project allows creativity with colors and shapes. It turns a simple table into a piece of art. Perfect for adding personality to your home decor.
Advanced Designs
Advanced designs for DIY end tables bring creativity and skill together. These projects are perfect for those who want unique pieces that stand out. They combine different styles and materials to create beautiful, functional furniture. These ideas challenge your woodworking abilities and spark imagination.
Live Edge Wood Tables
Live edge tables show the natural shape of the wood. The edges keep their original curves and bark. This style gives a rustic and organic feel to your room. It’s simple but eye-catching. You can use slabs of wood with smooth tops and rough edges. Finish with clear varnish to highlight the wood grain.
Intricate Carved Details
Carved details add elegance to your end tables. Patterns and shapes cut into the wood create texture and depth. You can carve flowers, geometric shapes, or custom designs. This technique takes patience and steady hands. Use carving tools or a router for precise cuts. Painted or stained carvings stand out even more.
Mixed Material Combos
Combining materials creates modern and interesting tables. Wood pairs well with metal, glass, or stone. Metal legs with wooden tops give an industrial look. Glass tops on wooden bases feel light and open. Stone accents add luxury and durability. Mixing materials lets you customize your table’s style and function.

Credit: www.youtube.com
Finishing Techniques
Finishing techniques bring your DIY end table to life. They protect the wood and add style. A good finish makes your table last longer and look better. Choose the right method to match your room and taste. Here are key tips for staining, painting, coatings, and hardware.
Staining And Painting Tips
Staining shows the wood’s natural grain and color. Use a clean cloth or brush to apply stain evenly. Wipe off extra stain quickly for a smooth look. Let it dry fully before adding more coats.
Painting covers the wood with color. Sand the surface first to help paint stick. Use primer to avoid patches and improve coverage. Apply thin coats and let each dry well. Choose paint made for wood furniture.
Protective Coatings
Protective coatings guard your table from scratches and water. Polyurethane is tough and clear. Apply it with a brush in thin layers. Let each layer dry before adding the next.
Wax offers a soft shine and smooth feel. Rub it in with a cloth and buff well. Oil finishes like tung or linseed oil soak into wood. They give a natural look but need reapplication over time.
Decorative Hardware
Hardware adds charm and function to your end table. Choose knobs, handles, or corner brackets that fit your style. Metal finishes like brass or black can match many designs. Attach hardware securely to avoid loosening.
Mix and match hardware for a unique look. Small details make a big difference in your finished piece.
Troubleshooting Common Issues
Building your own end table is rewarding but can come with small problems. These issues are common and easy to fix with simple steps. Knowing how to handle them saves time and keeps your project strong and beautiful.
Fixing Wobbly Legs
Wobbly legs make your table unstable. Check if screws or nails are loose. Tighten all fasteners carefully. If legs remain loose, add wood glue at joints for extra hold. Use small wood shims to even out uneven leg bottoms. This stops rocking and keeps the table steady.
Dealing With Wood Cracks
Wood cracks can appear during drying or use. Fill cracks with wood filler that matches your wood color. Press filler deep into the crack and smooth it out. Let it dry fully before sanding. For large cracks, use wood glue and clamps to close the split tightly. This restores strength and looks neat.
Sanding And Surface Imperfections
Rough or uneven surfaces need sanding. Start with medium-grit sandpaper to remove bumps. Move to fine-grit sandpaper for a smooth finish. Sand along the wood grain to avoid scratches. Clean dust with a damp cloth before staining or painting. Smooth surfaces improve the table’s look and feel.
Customizing Your Table
Customizing your DIY end table makes it truly yours. It adds personality and fits your needs perfectly. Small changes can improve both function and style. Simple ideas can turn a plain table into a standout piece.
Adding Shelves And Drawers
Shelves and drawers add extra storage space. They keep your items organized and close by. Installing a shelf under the tabletop is easy and useful. Drawers help hide clutter and keep surfaces clean. Choose sizes that suit the things you store.
Personalizing With Paint
Paint changes the whole look of your table. Pick colors that match your room’s style. Use smooth strokes for a clean finish. Try chalk paint for a matte, vintage effect. Adding a clear topcoat protects the color and wood.
Using Decals And Stencils
Decals and stencils add designs without much effort. They create patterns, shapes, or words on your table. Use adhesive decals for easy application and removal. Stencils let you paint custom designs in any color. Both options brighten your table with creative flair.
Credit: www.crazylaura.com
Frequently Asked Questions
What Materials Are Best For Diy End Tables?
Wood is the most popular choice for DIY end tables. It’s durable, easy to work with, and customizable. Pine, oak, and plywood are common options. You can also use metal or recycled materials for a unique look. Choose materials based on your style and budget.
How Long Does It Take To Build An End Table?
Building a simple DIY end table usually takes 2 to 4 hours. Complex designs may take longer due to detailed cuts and finishing. Prep time, like sanding and painting, adds extra hours. Planning and having all tools ready speeds up the process.
What Tools Do I Need For Diy End Tables?
Basic tools include a saw, drill, measuring tape, and screwdriver. Sandpaper or a sander is essential for smooth finishes. Clamps help hold pieces while assembling. Optional tools like a paintbrush or stain applicator complete the look. Safety gear is also important.
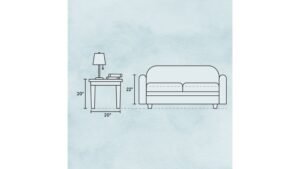
Can I Customize The Size Of My End Table?
Yes, DIY projects allow full customization of size. Measure your space and adjust dimensions accordingly. Customize height, width, and depth to fit your room’s needs. Personalizing size ensures the table matches your furniture perfectly.
Conclusion
Building your own end tables brings joy and pride. It saves money and lets you add a personal touch. You control the style, size, and color to fit your space. The process can be fun and teaches useful skills. Small mistakes?
No problem. Each table becomes unique and special. Start with simple designs, then try harder projects later. Enjoy the satisfaction of creating furniture with your own hands. Your home will feel warmer and more inviting with these handmade pieces. Why wait?
Begin your DIY end table journey today!
As an Amazon Associate, I earn from qualifying purchases.