Painting Ikea furniture can breathe new life into your home decor. It’s a simple way to add personality to plain pieces.
Ikea furniture is affordable and functional, but it often lacks character. A coat of paint can change that. Whether you want a bold statement or a subtle touch, painting Ikea furniture is a great DIY project. The process is straightforward and does not need professional skills.
With the right materials and techniques, you can transform any Ikea piece into a unique item. This guide will walk you through the steps to achieve a perfect finish. Let’s dive into how you can easily paint Ikea furniture and make it your own.
Choosing The Right Paint
Painting Ikea furniture can transform your space. But, choosing the right paint is crucial. The right paint will ensure durability and a perfect finish. In this section, we will explore the types of paint and color selection.
Types Of Paint
There are several types of paint you can use for your Ikea furniture. Each type has its own benefits and drawbacks. Here are the most common ones:
| Type of Paint | Pros | Cons |
|---|---|---|
| Latex Paint | Dries quickly, easy to clean | Less durable, needs primer |
| Chalk Paint | No priming needed, matte finish | Not as smooth, needs sealing |
| Spray Paint | Even coverage, quick application | Messy, needs ventilation |
| Acrylic Paint | Water-resistant, vibrant colors | Can be expensive, may need a topcoat |
Color Selection
Choosing the right color is just as important. The color you choose can set the mood for the room. Here are some tips to help you select the perfect color:
- Consider the existing color scheme in your space.
- Think about the mood you want to create. Soft colors create a calm atmosphere. Bright colors add energy.
- Test the color in a small area first. This ensures you like the final look.
- Use a color wheel to find complementary colors.
Remember, the right color can make your Ikea furniture look custom-made. Happy painting!
Gathering Necessary Supplies
Before painting Ikea furniture, gather all the necessary supplies. Proper preparation ensures a smooth and durable finish. Let’s break down the essentials.
Tools And Materials
You’ll need a few tools to get started. Grab a screwdriver to disassemble the furniture. Sandpaper is essential for smoothing surfaces. Use a brush or roller for applying paint. Keep a paint tray handy. Consider using a primer for better adhesion. Choose your paint wisely; latex or chalk paint works best.
Protective Gear
Safety is crucial. Wear gloves to protect your hands. Use a mask to avoid inhaling fumes. Goggles will shield your eyes from splashes. Lay down drop cloths to protect the floor. These items keep you safe and your workspace clean.
Preparing The Surface
Painting Ikea furniture can be a fun and creative project. The first step to a successful paint job is preparing the surface. This ensures the paint adheres well and the finish looks professional. Let’s look at the key steps in preparing your Ikea furniture for painting.
Cleaning The Furniture
Start by cleaning the furniture thoroughly. Dust, dirt, and grease can prevent the paint from sticking properly.
- Use a mild detergent mixed with warm water.
- Wipe down all surfaces with a soft cloth or sponge.
- Pay extra attention to areas that are frequently touched.
- Rinse with clean water and let it dry completely.
A clean surface is crucial for a smooth and even paint finish.
Sanding Techniques
Sanding the surface helps the paint adhere better. Here are some effective sanding techniques to follow:
- Use a fine-grit sandpaper (220-grit is ideal).
- Sand in a circular motion to avoid scratches.
- Focus on glossy or varnished areas.
- Wipe away any dust with a damp cloth.
- Ensure the surface is smooth and even.
Proper sanding creates a textured surface that grips the paint well. This step should not be skipped.
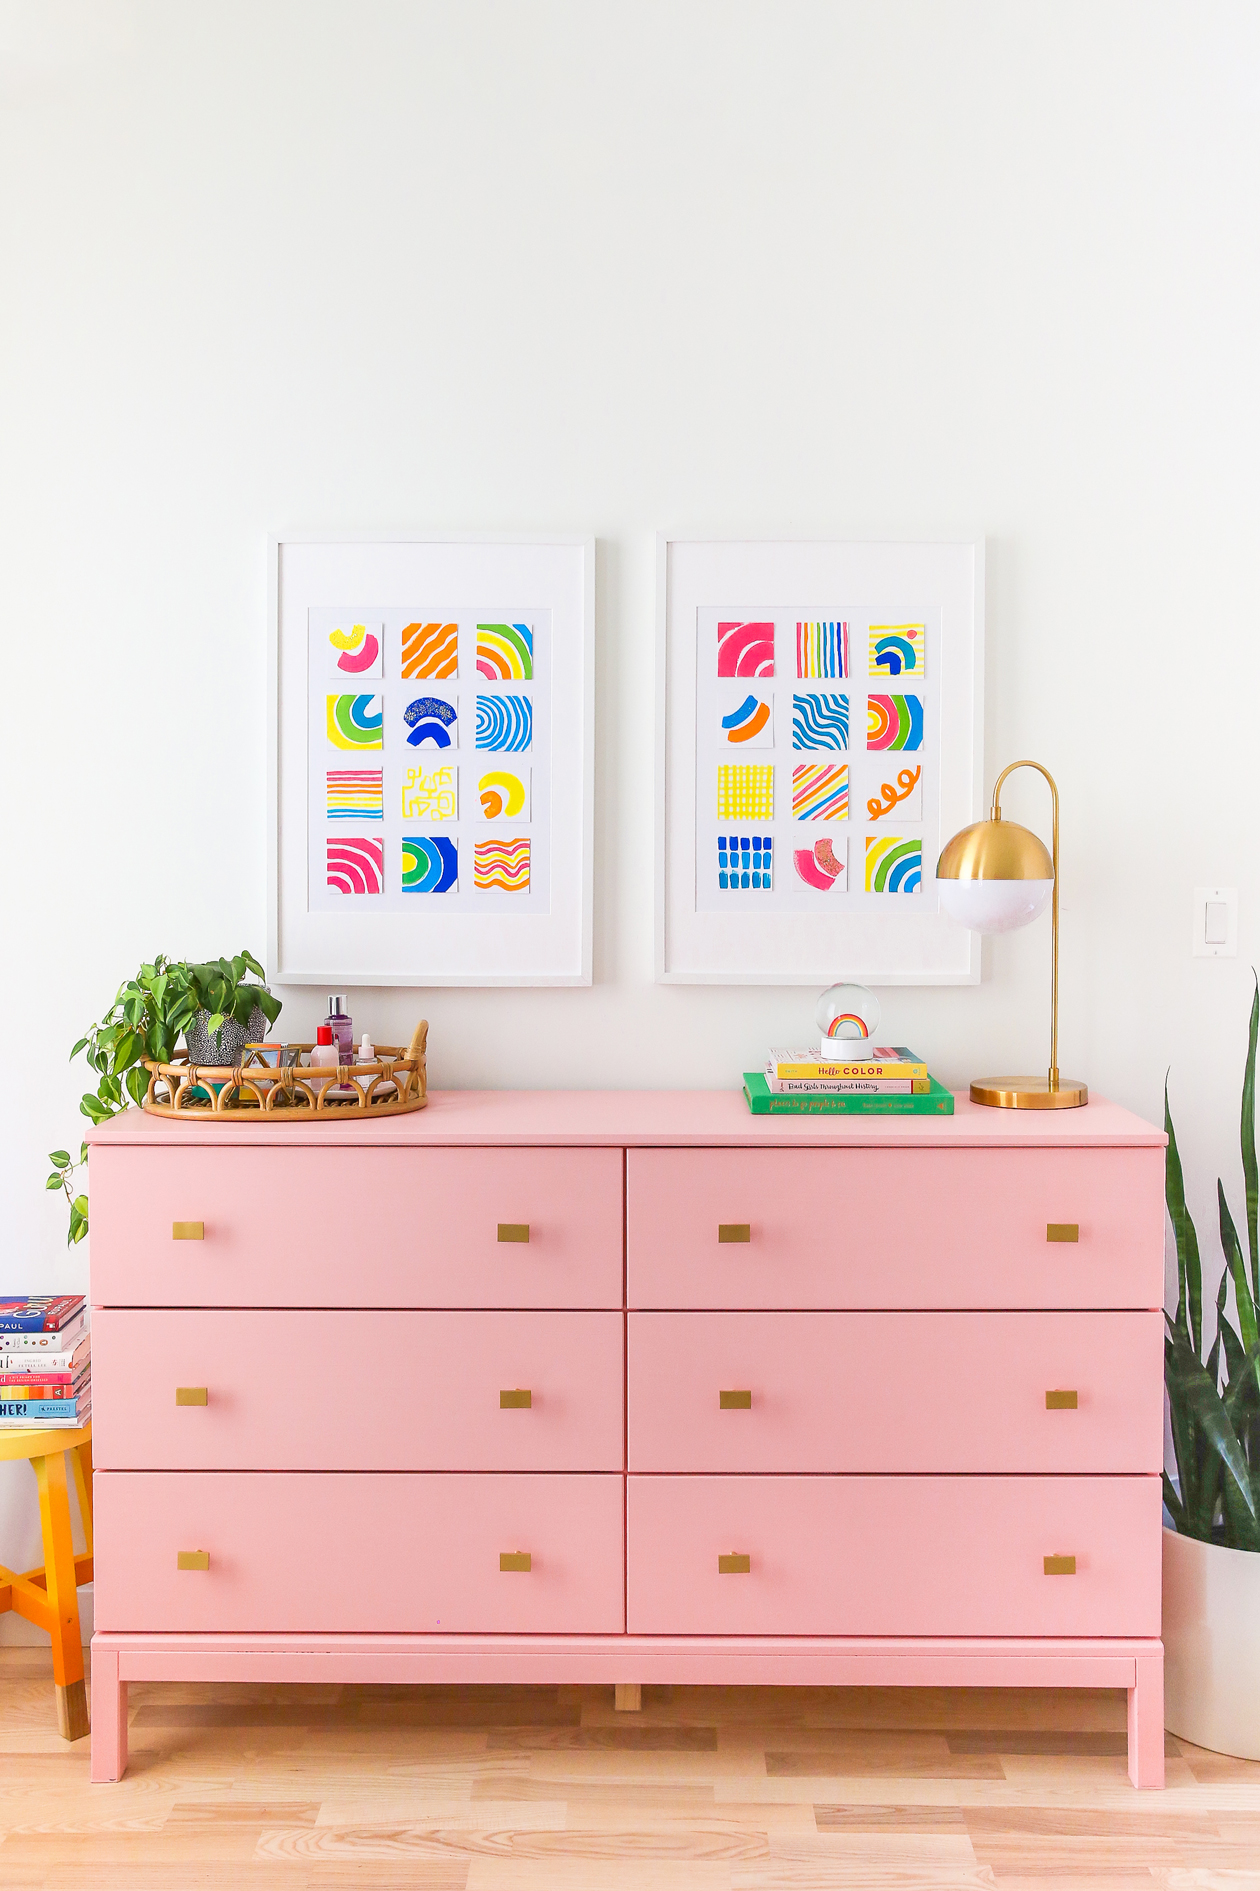
Credit: thecraftedlife.com
Priming The Furniture
Priming your Ikea furniture is a crucial step before painting. It helps the paint adhere better and provides a smooth finish. Skipping this step can result in chipped paint and an uneven surface. So, let’s explore the types of primer and application methods.
Types Of Primer
Different primers serve different purposes. Choosing the right one can make a big difference.
Oil-based primers are strong and durable. They work well on surfaces that need extra adhesion. Water-based primers dry quickly and are easy to clean up. They are ideal for most Ikea furniture pieces. Shellac-based primers are great for sealing knots and stains. They provide a smooth and even base.
Application Methods
Applying primer correctly is key to a great finish. Use a brush for small areas and edges. It gives you more control. For larger surfaces, use a roller. It covers more area quickly and evenly. Spray primers are also an option. They work well for intricate designs and hard-to-reach spots.
Start by cleaning the furniture. Remove any dust and dirt. Sand the surface lightly to create a texture for the primer to grip. Apply the primer in thin, even coats. Let each coat dry completely before adding the next. Two coats are usually enough. Once the primer is dry, you are ready to paint your Ikea furniture.
Painting Techniques
Painting Ikea furniture can transform any piece into a custom, stylish item. Using the right painting techniques ensures a smooth and durable finish. Below, we will explore different methods to paint Ikea furniture. Each technique has its own pros and cons. Let’s dive in!
Brush Vs. Roller
Choosing between a brush and a roller depends on your desired finish. Both have their unique advantages.
| Tool | Advantages | Disadvantages |
|---|---|---|
| Brush |
|
|
| Roller |
|
|
Spray Painting
Spray painting is another popular technique. It provides an even, professional finish. Here are some tips for spray painting Ikea furniture:
- Preparation: Sand the surface lightly. Clean it thoroughly. Ensure it is dry before painting.
- Primer: Use a primer designed for laminate. This helps the paint adhere better.
- Application: Hold the spray can 6-8 inches from the surface. Use smooth, sweeping motions. Apply multiple light coats.
- Drying: Allow each coat to dry completely. This prevents drips and uneven spots.
Spray painting is ideal for large, flat surfaces. It is also perfect for achieving a flawless finish.
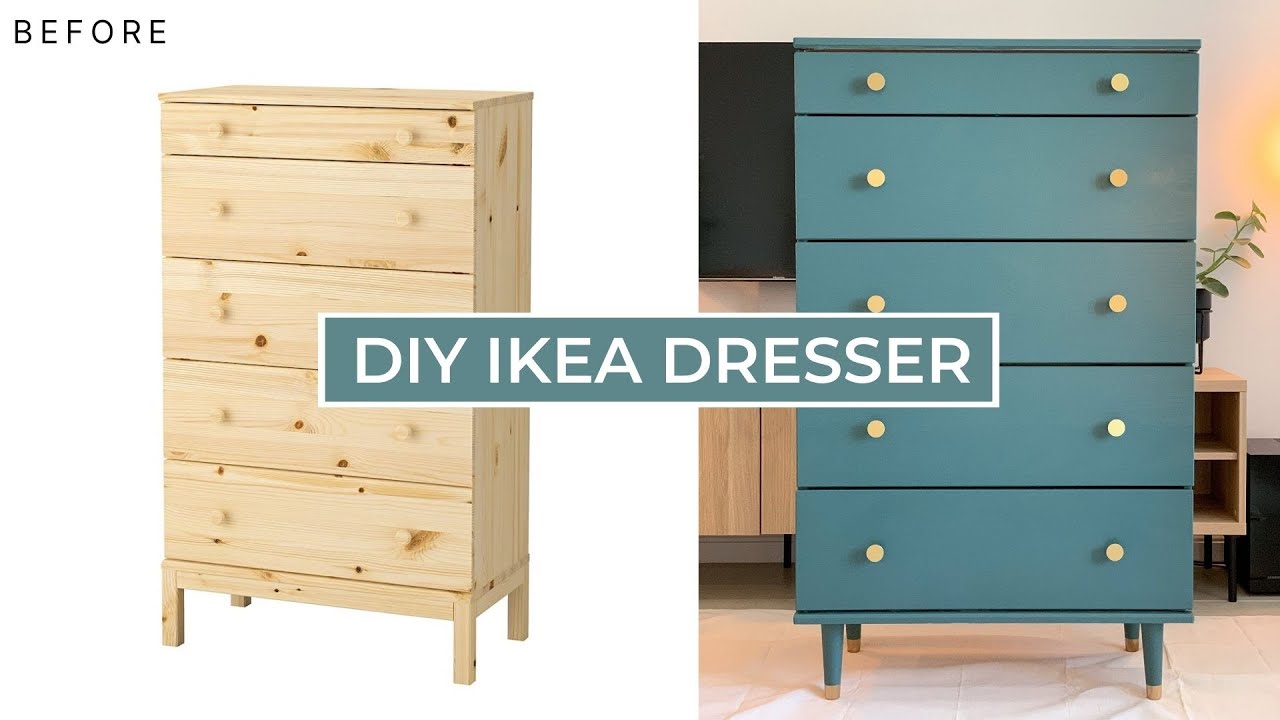
Credit: www.youtube.com
Applying Multiple Coats
Painting Ikea furniture can transform any piece into a stylish addition. Applying multiple coats is key to achieving a professional finish. This section will guide you through the process of applying multiple layers of paint. Following these steps ensures a smooth and durable finish.
Drying Times
Allowing proper drying times between coats is crucial. Each coat needs adequate time to dry before you apply the next one. This prevents smudging and uneven surfaces.
Refer to the paint’s instructions for specific drying times. Generally, most paints require at least 24 hours to dry. Humidity and temperature can affect drying times. Ensure your workspace is well-ventilated and at a stable temperature.
| Paint Type | Recommended Drying Time |
|---|---|
| Latex Paint | 4-6 hours |
| Oil-Based Paint | 24 hours |
| Chalk Paint | 30-60 minutes |
Sanding Between Coats
Sanding between coats is essential for a smooth finish. Lightly sanding the surface removes any imperfections and allows the next coat to adhere better.
- Wait for the paint to dry completely.
- Use fine-grit sandpaper (220-grit is ideal).
- Sand the surface gently in circular motions.
- Wipe away dust with a tack cloth or damp rag.
Repeat these steps for each coat. This process may seem tedious, but it ensures a flawless finish.
Applying multiple coats with proper drying times and sanding between each layer will enhance the beauty and longevity of your painted Ikea furniture.
Finishing Touches
After painting your Ikea furniture, the final steps are crucial. These steps ensure durability and add a polished look.
Sealing The Paint
Sealing your painted furniture is essential. It protects the paint from chipping and wear. Use a clear, water-based sealant. Apply it evenly with a brush or a roller. Let it dry completely before using the furniture. A second coat can provide extra protection.
Adding Hardware
New hardware can transform your Ikea piece. Choose knobs or handles that match your style. Measure and mark where each piece will go. Use a drill to create holes for the screws. Attach the hardware securely. This step adds a unique touch and makes the furniture look customized.
Common Mistakes To Avoid
Painting Ikea furniture can be a fun and rewarding project. But many people make mistakes that can ruin the final look. Here, we’ll discuss some common pitfalls and how to avoid them.
Peeling Paint
Peeling paint is a frequent issue. It often happens when the surface isn’t properly prepared. Ikea furniture usually has a smooth finish. This surface is not ideal for paint to stick.
To prevent peeling, sand the surface first. Use a fine-grit sandpaper. This creates a rough texture for the paint to adhere to. Also, clean the surface thoroughly. Any dust or grease can cause the paint to peel.
Another tip is to use a primer. A primer will help the paint stick better. Make sure you use a primer suitable for the material of the furniture. This step is crucial for a long-lasting finish.
Uneven Coverage
Uneven coverage makes the furniture look unprofessional. It often results from using the wrong brush or roller. Use a high-quality brush or foam roller for even application. Cheap brushes can leave brush strokes.
Also, apply the paint in thin, even coats. Thick coats can lead to drips and uneven spots. Allow each coat to dry completely before adding the next. This ensures a smooth and even finish.
Another common mistake is not stirring the paint well. Paint can separate over time. Stir it thoroughly to mix all components evenly. This ensures consistent color and texture.
| Common Mistakes | How to Avoid |
|---|---|
| Peeling Paint | Sand the surface, clean it, and use a primer. |
| Uneven Coverage | Use a quality brush, apply thin coats, and stir paint well. |
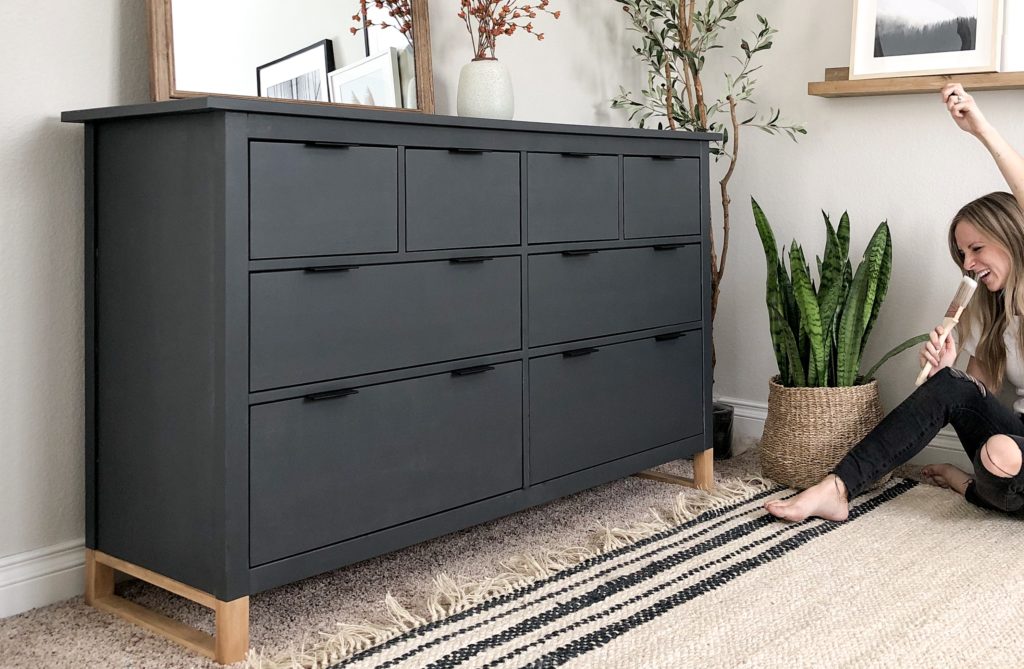
Credit: angelarosehome.com
Frequently Asked Questions
Can You Paint Ikea Furniture Without Sanding?
Yes, you can paint Ikea furniture without sanding. Use a good primer designed for laminate surfaces. This helps the paint adhere better.
What Paint Should I Use On Ikea Furniture?
Use high-quality latex or chalk paint for Ikea furniture. These paints provide good coverage and durability for your furniture.
Do I Need To Prime Ikea Furniture Before Painting?
Yes, priming is essential for Ikea furniture. A primer ensures better paint adhesion and a smoother finish.
How Do I Prepare Ikea Furniture For Painting?
Clean the furniture with a mild detergent. Remove any dirt or grease. Lightly sand the surface for better primer adhesion.
Conclusion
Transforming Ikea furniture with paint can be simple and fun. Start by prepping your piece properly. Clean, sand, and prime it well. Choose the right paint for the best finish. Use thin coats for a smooth look. Let each layer dry completely.
Seal your work for lasting beauty. With patience and care, your Ikea furniture can look unique and stylish. Enjoy the process and your refreshed space. Happy painting!
As an Amazon Associate, I earn from qualifying purchases.