Looking to add a personal touch to your living space? Building your own side table is easier than you think, and it gives you a unique piece that fits perfectly in your home.
Imagine having a stylish, sturdy table made by your own hands—designed just the way you want it. Whether you’re a beginner or have some DIY experience, this guide will walk you through every step. Ready to create something functional and beautiful?
Let’s get started and turn your vision into reality.
Choosing Materials
Choosing the right materials is the first step to build a strong side table. The materials affect the table’s look and how long it lasts. Picking good wood and tools helps make the project easier and the final piece better. This section covers the types of wood, tools, and extra supplies needed.
Types Of Wood
Wood choice changes the table’s style and strength. Pine is soft, easy to cut, and budget-friendly. Oak is hard and durable, perfect for a long-lasting table. Birch has a smooth texture and is good for painting. Choose wood that fits your design and use. Avoid wood with cracks or knots that weaken the structure.
Tools Needed
Basic tools make the building process smooth. A saw cuts the wood into shape. A drill makes holes for screws. Sandpaper smooths rough edges and surfaces. A measuring tape ensures accurate cuts. A screwdriver or drill driver helps fasten screws tightly. Use tools that are in good condition and fit your skill level.
Additional Supplies
Extra items help finish and protect the table. Wood screws hold pieces firmly together. Wood glue adds extra strength to joints. Paint or stain improves the look and protects wood. Brushes or rags apply finishes evenly. Use clamps to keep parts steady while glue dries. Sanding blocks help reach corners and small spaces.

Credit: www.youtube.com
Designing Your Side Table
Designing your side table is the first step in building a piece that fits your space and style. This stage helps you plan every detail clearly. A well-designed side table looks good and works well in your room.
Careful design saves time and materials. It guides you through building with confidence and precision.
Selecting The Style
Choose a style that matches your room’s look. Simple, modern, rustic, or classic—decide what fits best. Think about the shapes and lines you like. The style affects the table’s shape and materials.
Measuring Dimensions
Measure the space where the table will go. Note the height, width, and depth limits. Make sure it fits without crowding the area. Consider what you will put on the table. Size affects both function and appearance.
Sketching The Plan
Draw a simple sketch of your side table design. Include all parts like legs, top, and shelves. Use your measurements for accurate proportions. This plan acts as a map for building. It helps avoid mistakes and saves effort.
Cutting And Preparing Wood
Cutting and preparing wood is a key step in building a side table. The wood must be the right size and smooth. Proper preparation helps your table look great and last longer.
Start with careful measuring and marking. Next, cut the wood safely. Finish by sanding the surfaces for a smooth touch.
Marking Cut Lines
Use a pencil and a ruler to mark where you will cut. Measure twice to avoid mistakes. Draw straight lines on the wood. Clear marks help you cut accurately.
Safe Cutting Techniques
Wear safety glasses to protect your eyes. Use a stable surface for cutting. Hold the wood firmly but keep fingers away from the blade. Cut slowly and follow the marked lines. A sharp saw makes cutting easier and safer.
Sanding Surfaces
Sand the wood with medium-grit sandpaper first. This removes rough edges and splinters. Then use fine-grit sandpaper for a smooth finish. Sand along the grain to avoid scratches. Clean off dust before assembling the table.
Credit: addicted2diy.com
Assembling The Table
Assembling the table is the key step to turn parts into a useful piece. Careful connection of legs and top creates a strong, attractive side table. Follow simple steps to join parts and check stability for long-lasting use.
Joining Legs And Top
Start by placing the table top upside down on a soft surface. Align each leg at the corners. Mark the screw holes clearly. This ensures the legs attach in the right place. Holding the legs steady, prepare to fix them securely.
Using Screws And Glue
Apply wood glue on the contact points of legs and top. This adds extra strength to the joints. Next, drive screws through the legs into the table top. Use a drill or screwdriver for this step. Tighten screws firmly, but avoid cracking the wood.
Ensuring Stability
Check the table by placing it upright on a flat floor. Press gently on the top to feel any wobble. If it moves, tighten screws more. Add corner braces if needed for extra support. A stable table lasts longer and feels safe to use.
Finishing Touches
Finishing touches bring your side table to life. They protect the wood and improve its look. These final steps make your project last longer and look more polished. Take your time to ensure each detail is just right. A well-finished table feels smooth and looks inviting.
Applying Paint Or Stain
Choose paint or stain based on your style. Paint hides wood grain and adds color. Stain highlights the natural wood texture. Apply with a brush or cloth in even strokes. Let each coat dry fully before adding the next. Two or three coats create a rich finish.
Sealing For Protection
Seal your table to protect it from damage. Use a clear polyurethane or varnish. These coatings shield against water, scratches, and dirt. Apply thin coats with a clean brush. Sand lightly between coats for a smooth surface. Sealing keeps your table looking fresh for years.
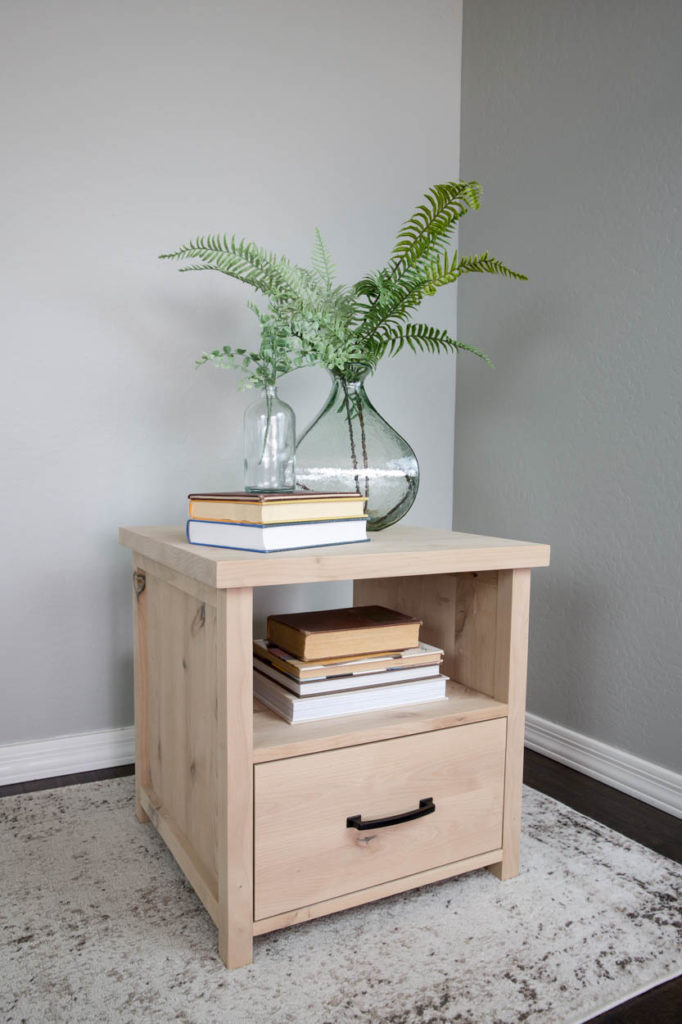
Adding Decorative Elements
Decorate your side table to match your space. Add knobs, handles, or metal corners for style. Use stencils or decals for patterns and designs. Small plants or books make great table accessories. These touches make your table unique and personal.
Tips For Success
Building a side table is fun and rewarding. Small mistakes can slow you down. These tips help make your project smooth and successful.
Common Mistakes To Avoid
Measure twice, cut once. Many builders rush cutting, causing errors. Avoid using worn-out tools; they reduce accuracy. Skip complicated designs at first. Simple shapes work best for beginners. Do not ignore safety gear. Gloves and goggles protect your hands and eyes. Take your time assembling parts. Rushing leads to weak joints and wobbly tables.
Maintenance Advice
Keep your side table clean. Dust it regularly with a soft cloth. Use coasters to protect the surface from spills. Avoid placing hot items directly on the wood. Check screws and joints often. Tighten any loose parts to keep stability. Apply wood polish or oil every few months. This keeps the wood healthy and shiny. Store your table away from direct sunlight to prevent fading.
Customizing Your Table
Choose paint or stain that matches your room’s style. Add unique handles or knobs for drawers. Use stencils or stickers to create patterns. Consider adding a shelf for extra storage. Attach wheels to make your table easy to move. Mix materials like wood and metal for a modern look. Personal touches make your side table one of a kind.
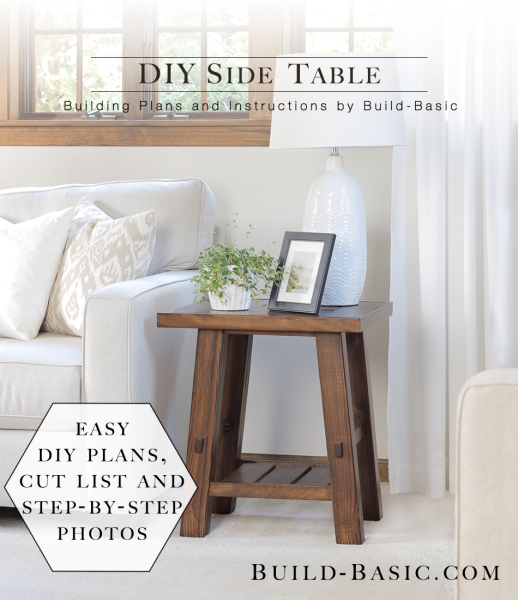
Credit: build-basic.com
Frequently Asked Questions
What Materials Are Best For Building A Side Table?
Wood is the most popular material for side tables due to its durability. Plywood and MDF are budget-friendly options. Metal and glass can add a modern touch. Choose materials based on your style, budget, and intended use for the table.
How Long Does It Take To Build A Side Table?
Building a simple side table usually takes 2 to 4 hours. More complex designs may take longer, depending on skill level. Proper preparation and tools can speed up the process. Patience and precision are key to a quality finish.
What Tools Do I Need To Build A Side Table?
Basic tools include a saw, drill, screwdriver, measuring tape, and sandpaper. A hammer and clamps are helpful for assembly. Safety gear like gloves and goggles is essential. Using the right tools ensures accuracy and safety during construction.
How Can I Customize My Side Table Design?
You can customize by choosing different wood stains, paints, or finishes. Adding shelves, drawers, or unique legs adds functionality and style. Personal touches like decorative hardware or carvings make your table unique. Customization enhances both appearance and usability.
Conclusion
Building a side table is a fun and useful project. You can choose the style and size that fits your space. Using basic tools and materials makes the process easier. Take your time to measure and cut carefully. Sand and finish the table to make it smooth and strong.
This small project adds charm to any room. Try it yourself and enjoy making something with your hands. A simple side table can bring big changes to your home decor. Keep practicing to improve your skills step by step.
As an Amazon Associate, I earn from qualifying purchases.