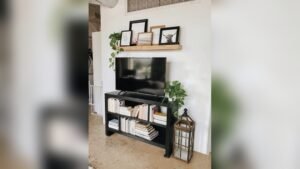
Looking for the perfect TV stand that fits your space and style? Instead of settling for something off the shelf, why not build one yourself?
When you create your own TV stand, you get exactly what you want—custom size, the right storage, and a unique look that matches your room. Plus, the sense of pride and satisfaction you’ll feel is unbeatable. In this guide, you’ll discover simple steps and tips to build a sturdy, stylish TV stand even if you’re new to woodworking.
Ready to transform your living room and impress your guests? Let’s get started!

Credit: www.youtube.com
Choosing The Right Materials
Choosing the right materials for your TV stand is important. The materials affect how strong and lasting the stand will be. Picking good materials also helps the stand look nice and match your room. This guide will help you find the best wood and tools for the job.
Types Of Wood To Consider
Wood is the main material for building a TV stand. Solid wood is strong and lasts a long time. Oak and maple are good choices because they are hard and resist damage. Pine is softer but easier to work with and less costly. Plywood is another option. It is made from layers of wood glued together. Plywood is stable and less likely to warp. Choose wood that fits your style and budget.
Tools And Hardware Needed
Good tools make building easier and safer. You need a saw to cut the wood. A drill helps make holes and screw parts together. Sandpaper smooths rough edges. Clamps hold pieces while glue dries. Screws and nails join parts firmly. Wood glue adds extra strength. Choose screws that match the wood thickness. Make sure all tools are sharp and in good condition.
Planning Your Design
Planning your design is the first and most important step in building a TV stand. It helps you know exactly what you need and how the stand will fit in your space. Careful planning saves time, money, and avoids mistakes.
This phase involves measuring your space and sketching the layout. Both steps make the building process smoother and more precise.
Measuring Your Space
Start by measuring the area where the TV stand will go. Measure the width, height, and depth of the space. Note any obstacles like power outlets or vents.
Write down all measurements clearly. These numbers guide the size of your TV stand. Make sure to leave extra space for ventilation and cables.
Sketching The Layout
Draw a simple sketch of your TV stand design on paper. Include the dimensions from your measurements. Sketch the shelves, compartments, and any drawers.
This helps you visualize the final product. Adjust the design until it looks balanced and fits well. Keep the sketch for reference during building.
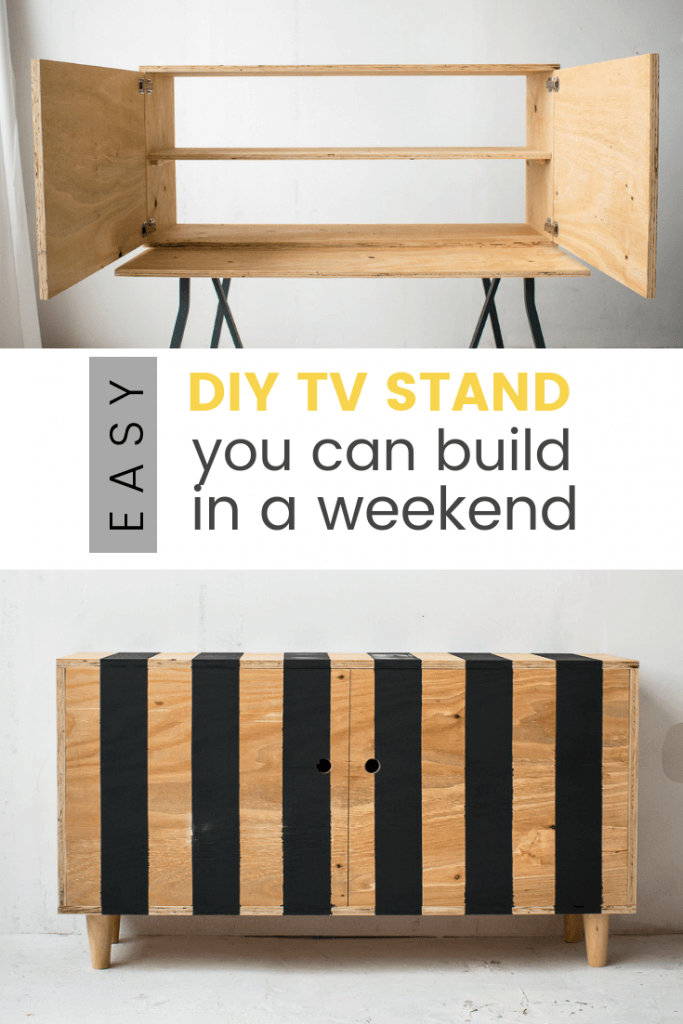
Cutting And Preparing Wood
Cutting and preparing wood is the first step in building a sturdy TV stand. This stage shapes the wood pieces to fit your design perfectly. Proper cutting and smoothing make assembly easier and improve the stand’s look. Precise work here ensures the stand holds the TV safely and looks neat.
Safe Cutting Techniques
Always wear safety goggles and gloves before cutting wood. Use a sharp saw to make clean cuts. Measure twice and cut once to avoid mistakes. Secure the wood firmly with clamps to stop it from moving. Cut slowly and steadily to keep control. Follow the marked lines carefully for exact shapes. Keep your fingers away from the saw blade at all times.
Sanding And Smoothing Edges
Sand all cut edges to remove splinters and rough spots. Use medium-grit sandpaper first, then fine-grit for a smooth finish. Sand in the direction of the wood grain to avoid scratches. Check edges with your hand to feel for smoothness. Rounded edges look better and reduce the risk of injury. Clean dust off the wood after sanding for better paint or stain adhesion.
Credit: grillo-designs.com
Assembling The Frame
Assembling the frame is a key step in building a TV stand. It forms the base that supports the entire structure. A strong frame keeps the stand steady and safe for your TV.
Follow clear steps and use the right tools. This helps create a frame that lasts and holds weight well.
Joining Methods
Choose joining methods based on your materials and tools. Screws are common and easy to use. They hold pieces tightly together.
Wood glue adds extra strength and prevents movement. Use it along with screws for a solid hold. Dowels fit into drilled holes for neat joints. Nails can work but offer less strength than screws.
Try to keep joints flush and even. This improves both look and stability.
Ensuring Stability
Check the frame for square corners using a carpenter’s square. Uneven angles cause wobbling later. Tighten all screws and bolts firmly but avoid over-tightening.
Add corner braces or metal brackets for extra support. These keep the frame from twisting or bending. Test the frame by applying gentle pressure. It should feel solid and not shift.
Let glue dry completely before moving on. A stable frame makes the whole project safer and stronger.
Adding Shelves And Storage
Adding shelves and storage to your TV stand gives it more function. It helps keep your living room tidy. You can store media players, DVDs, and game consoles neatly. Thoughtful storage makes your TV stand more useful and stylish.
Plan the shelves carefully. Think about what items you will keep. Measure your devices and decide shelf sizes. This step creates a balanced and practical design.
Customizing Shelf Sizes
Measure the height, width, and depth of devices. Custom shelves fit your equipment perfectly. Leave some extra space for air circulation. Adjustable shelves offer flexibility for future changes. Use strong materials to hold weight safely. Custom shelves make your TV stand unique and practical.
Installing Drawers Or Cabinets
Drawers and cabinets hide clutter and protect items from dust. Choose smooth sliding drawers for easy access. Cabinets with doors keep things out of sight. Add handles that match your TV stand style. Secure hinges keep doors steady and quiet. Drawers and cabinets improve storage and keep your space neat.
Finishing Touches
The finishing touches make your TV stand look complete and polished. These final steps protect the wood and improve its beauty. Careful finishing also helps your stand last longer. You can choose to paint or stain the wood depending on your style. Adding a protective coat is key to keeping the surface safe from damage.
Painting And Staining Tips
Start by sanding the wood smoothly. Use fine-grit sandpaper for the best results. Wipe off dust with a damp cloth. Apply a primer if you paint the wood. It helps the paint stick better and last longer. Use thin, even coats of paint or stain. Let each coat dry fully before adding another. Test colors on a scrap piece of wood first. This avoids surprises and ensures you like the shade.
Protective Coatings
Choose a clear protective finish to seal your work. Polyurethane is popular for its strong protection. Apply it with a clean brush in thin layers. Let each layer dry and sand lightly between coats. This creates a smooth, durable surface. For a natural look, try wax or oil finishes. They protect while keeping the wood’s texture visible. Always work in a well-ventilated area when using finishes.
Tips For Maintenance And Care
Taking care of your TV stand keeps it looking new and lasting longer. Simple habits protect the wood and finish from damage. Regular attention helps avoid costly repairs and keeps your space neat.
Follow easy tips for cleaning and fixing small problems. This care makes your stand a strong and beautiful part of your room.
Cleaning Techniques
Dust your TV stand often with a soft cloth. Avoid rough or wet cloths that can scratch or warp the wood. Use a dry or slightly damp cloth to wipe the surface gently. For stubborn spots, mix mild soap with water, then wipe with a damp cloth and dry immediately.
Do not use harsh chemicals or abrasive cleaners. They can damage the finish or remove paint. Clean spills right away to stop stains or water damage. Use coasters under drinks to protect the surface from rings and marks.
Repairing Minor Damages
Small scratches and dents happen easily. Fix minor scratches with a wood repair marker or crayon that matches the stand’s color. Lightly rub the product on the scratch and buff with a soft cloth.
For dents, place a damp cloth on the spot and press with a warm iron. The steam helps the wood swell and reduce the dent. Avoid heavy repairs that can make the damage worse. Tighten loose screws or joints to keep the stand stable. Replace damaged parts like knobs or brackets quickly to stop further damage.

Credit: www.youtube.com
Frequently Asked Questions
What Materials Do I Need To Build A Tv Stand?
You need wood boards, screws, nails, wood glue, sandpaper, and a finish. Choose sturdy, durable wood like pine or oak for stability and aesthetics.
How Long Does It Take To Build A Tv Stand?
Building a TV stand typically takes 4 to 8 hours. Time depends on design complexity, your skill level, and drying times for finishes or glue.
What Tools Are Essential For Building A Tv Stand?
Essential tools include a saw, drill, screwdriver, measuring tape, level, clamps, and sander. These tools ensure accuracy and smooth construction.
How Do I Ensure My Tv Stand Is Stable?
Use strong joints like screws and wood glue, reinforce corners, and choose thick wood. Ensure the stand’s width matches your TV size for balance.
Conclusion
Building a TV stand can be simple and fun. Start with a clear plan and gather all tools. Take your time to measure and cut carefully. Assemble the pieces step by step for best results. Personalize your stand with paint or stain.
A sturdy TV stand saves space and looks great. Enjoy the pride of your finished work every day. This project fits well into any home style. Try building one and see how rewarding it feels!
As an Amazon Associate, I earn from qualifying purchases.