
Are you ready to create a coffee table that perfectly fits your style and space? Building your own coffee table is easier than you think, and it gives you a unique piece that no store can offer.
Imagine the pride you’ll feel every time you see your handmade table in your living room. In this guide, you’ll discover simple, step-by-step instructions to help you bring your vision to life. Whether you’re a beginner or just looking for fresh ideas, this article will equip you with everything you need to start building your perfect coffee table today.
Let’s get started!
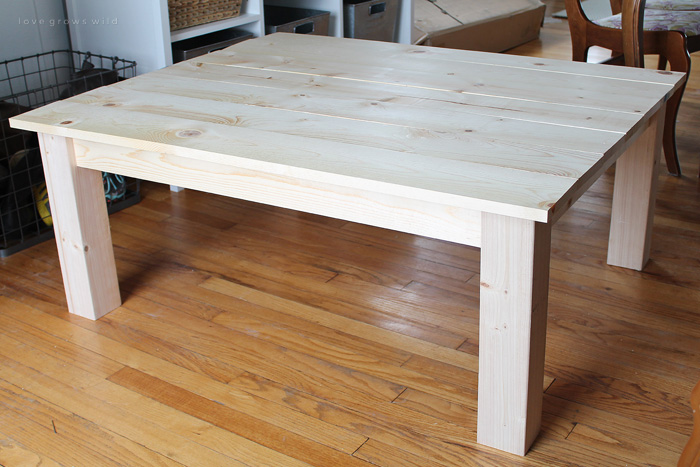
Credit: lovegrowswild.com
Choosing The Right Materials
Choosing the right materials shapes the look and strength of your coffee table. Good choices make your project last longer and look better. This section guides you through picking wood types and finishes. It also covers hardware choices. These details matter for a sturdy, stylish table.
Selecting Wood Types
Wood defines the table’s style and durability. Hardwoods like oak and maple are strong and last long. Softwoods such as pine are easier to cut and cheaper. Choose wood that fits your budget and skill level. Think about the grain pattern and color. These affect how your table will look.
Considering Finishes And Hardware
Finishes protect wood and enhance its beauty. Options include paint, stain, or varnish. Stain shows the wood grain. Paint hides it but adds color. Hardware like screws and nails hold pieces together. Pick hardware that fits the wood thickness. Choose styles that match your table’s design.
Gathering Essential Tools
Before starting to build your coffee table, gather all the tools you need. Having the right tools makes the work easier and faster. It also helps to create a strong and neat table. Tools come in two types: basic woodworking tools and safety equipment. Both are very important for a smooth project.
Basic Woodworking Tools
Start with a good saw. A handsaw or circular saw works well for cutting wood. A measuring tape helps you get exact lengths. Use a square to keep your cuts straight. Sandpaper or a sanding block smooths rough edges. A drill with bits allows you to make holes and fix screws. Clamps hold pieces steady while you work. A hammer is useful for nails and light tapping. These tools cover most tasks in building a coffee table.
Safety Equipment
Protect yourself first. Safety glasses keep dust and wood chips out of your eyes. Ear protection reduces noise from power tools. Gloves protect your hands from splinters and sharp tools. A dust mask stops you from breathing in sawdust. Wear closed shoes to protect your feet. Keep your workspace clean to avoid accidents. Safety gear helps you work without injury or discomfort.
Designing Your Coffee Table
Start by choosing the right wood and tools for your coffee table. Cut and join pieces carefully to build a sturdy frame. Finish with sanding and painting for a smooth look.
Measuring And Planning
Start by measuring the space where the coffee table will sit. Note the length, width, and height limits. Think about how much room you want around the table. Measure your couch and chairs to match the table’s height for comfort. Planning these details helps avoid mistakes later. It also ensures the table fits well with your room’s style and size.
Sketching Your Design
Draw a simple sketch of your coffee table idea. Include top, side, and front views if possible. Mark all measurements clearly on the sketch. This visual helps you see the shape and size before building. Make changes on paper first to save time and materials. A clear design guides you through the construction process smoothly.
Cutting And Preparing Wood
Cutting and preparing wood is a key step in building a strong coffee table. It sets the base for the entire project. Precise cuts and smooth edges help the pieces fit well. This ensures a neat look and long-lasting furniture.
Take time to work carefully. Measure twice, cut once. Preparing wood right makes assembly easier and safer.
Marking Cuts Accurately
Use a pencil and a ruler to mark your wood. Draw clear lines where you want to cut. Make sure the lines are straight and exact. Double-check measurements before starting to cut. This step saves wood and prevents mistakes.
Mark all pieces needed for your coffee table. Label each one to avoid confusion later. Clear markings help keep your work organized and efficient.
Sanding And Smoothing Edges
After cutting, the edges of the wood can be rough. Use sandpaper or a sanding block to smooth them. Sand all sides evenly to avoid splinters. Smooth edges give your table a polished look.
Sanding also helps paint or finish stick better. Take time on this step for a professional finish. Clean the dust off before moving to assembly.
Assembling The Table Frame
Assembling the table frame is a crucial step in building a coffee table. This part forms the base that holds the tabletop and legs together. A strong frame ensures the table lasts long and stays steady. Follow clear steps to build a reliable frame that supports the whole structure. Focus on how parts join and how to keep everything stable.
Joining Techniques
Choose simple joining methods for a sturdy frame. Wood glue works well for all joints. Use screws for extra strength. Drill pilot holes to avoid wood splitting. Dowels fit tight and hide screw heads. Pocket holes provide a clean look and strong hold. Clamps keep pieces steady while glue dries. Ensure all joints fit well before gluing or screwing.
Ensuring Stability
Check the frame for square angles using a carpenter’s square. Uneven frames cause wobbling. Tighten all screws firmly but avoid over-tightening. Reinforce corners with metal brackets if needed. Use cross braces to stop side-to-side movement. Place the frame on a flat surface during assembly. Test stability by gently shaking the frame. Adjust any loose parts before adding the tabletop.

Credit: www.youtube.com
Adding The Tabletop
Adding the tabletop is a key step in building your coffee table. This part gives the table its shape and function. Choose a smooth and sturdy surface for the best results.
Proper attachment ensures the tabletop stays strong and flat. Take your time to align everything carefully. This will make your coffee table safe and durable.
Attaching The Surface
Place the tabletop on the frame gently. Check that it fits well and is centered. Use clamps to hold it in place during the next steps. Make sure the edges line up evenly with the base.
Double-check the tabletop position before securing it. Small adjustments now save big problems later. A level surface means a better-looking table.
Securing With Fasteners
Choose strong screws or bolts for fastening the tabletop. Use screws that are the right length to avoid damage. Drill pilot holes to prevent wood from splitting.
Fasten the tabletop evenly, starting from the center and moving outwards. Tighten screws just enough to hold the surface firmly. Avoid overtightening to keep the wood safe.
Check the table for any wobble after securing. Adjust screws if needed for a solid feel. A well-fastened tabletop lasts longer and looks better.
Finishing Touches
The finishing touches bring your coffee table to life. This stage gives your table style and protection. Careful finishing improves both look and strength. It makes your table last longer and feel smooth to touch.
Applying Stain Or Paint
Choose a stain or paint that fits your room style. Stain shows the wood grain and adds warm colors. Paint covers the wood and gives a solid color. Use a brush or cloth to apply evenly. Let each coat dry fully before adding the next. Light sanding between coats helps the finish stick well.
Sealing For Durability
Sealing protects your coffee table from water and scratches. Use a clear sealant like polyurethane or varnish. Apply thin, even coats with a clean brush. Let each layer dry completely before the next. Sand lightly between coats for a smooth surface. Sealing keeps your table looking new for years.
Tips For Maintenance
Maintaining your coffee table keeps it looking fresh and new for years. Simple care steps help protect your hard work and investment. Proper upkeep prevents damage and extends the table’s life.
Follow easy maintenance tips to keep your coffee table in great shape. These help avoid common problems and preserve its beauty.
Cleaning Guidelines
Use a soft cloth to wipe dust daily. Avoid rough materials that can scratch the surface. Mild soap and water work well for regular cleaning.
Never soak the table in water. Dry it immediately after cleaning. Avoid harsh chemicals that can damage the finish.
Preventing Damage
Use coasters under drinks to stop water rings. Place pads under heavy items to avoid dents. Avoid direct sunlight, which can fade the wood.
Keep sharp objects away to prevent scratches. Tighten screws and bolts regularly to keep the table stable. Simple care preserves your coffee table’s charm and strength.
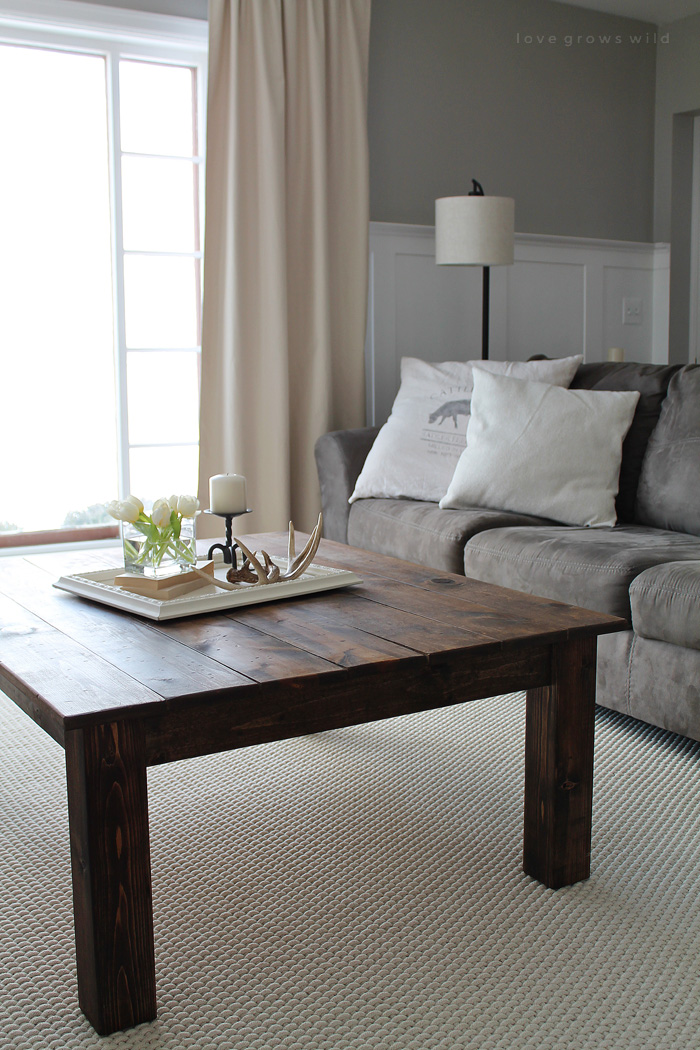
Credit: lovegrowswild.com
Frequently Asked Questions
What Materials Are Best For Building A Coffee Table?
Wood like oak, pine, or walnut is ideal for coffee tables. These woods are durable, easy to work with, and give a classic look. You can also use plywood or MDF for budget-friendly options. Choose materials based on style, durability, and budget.
How Long Does It Take To Construct A Coffee Table?
Constructing a basic coffee table typically takes 4 to 6 hours. This includes measuring, cutting, assembling, and finishing. Complex designs or additional features may require more time. Proper preparation speeds up the process and ensures a quality result.
What Tools Do I Need To Build A Coffee Table?
Essential tools include a saw, drill, measuring tape, screwdriver, and sandpaper. A hammer and clamps are also helpful. For finishing, you may need paint or stain brushes. Having the right tools ensures accuracy and safety during construction.
How Do I Finish A Coffee Table For Durability?
Apply a wood primer first to seal the surface. Then use polyurethane or varnish for protection. Multiple thin coats dry faster and offer better durability. Sand lightly between coats for a smooth, lasting finish.
Conclusion
Building a coffee table can be simple and fun. You only need basic tools and clear steps. Each part fits together like a puzzle. Take your time and enjoy the process. Soon, you will have a unique table made by you.
It adds charm to any room and shows your effort. Try customizing it with your favorite colors or designs. This project boosts your skills and brings satisfaction. Start now, and watch your ideas turn into wood and nails.
As an Amazon Associate, I earn from qualifying purchases.