Looking for a way to add style and smart storage to your living space? Making your own ottoman with storage might be just what you need.
Imagine having a beautiful piece of furniture that not only looks great but also hides away your clutter. You’ll save money, customize it to fit your style, and enjoy the satisfaction of creating something with your own hands. Ready to learn how to make an ottoman with storage that suits your home perfectly?
Keep reading, and I’ll guide you step-by-step through the easy process.
Materials And Tools Needed
Starting a project to make ottomans with storage needs the right materials and tools. Choosing good supplies makes the process easier and improves the final product. This section explains what you need before you begin.
Choosing The Right Fabric
Pick a fabric that is strong and easy to clean. Cotton, linen, or polyester work well for ottomans. Look for thick material to hold up against wear and tear. Consider colors and patterns that match your room style. A fabric with a tight weave lasts longer and looks neat.
Selecting Wood And Hardware
Use solid wood like pine or plywood for the ottoman frame. These woods are sturdy and affordable. For hardware, get hinges that open smoothly and support weight. Screws and nails should be strong enough to hold the frame tight. Sandpaper helps smooth rough edges for safety.
Essential Tools For The Project
Gather basic tools before starting your ottoman. A saw cuts wood to the right size. A drill makes holes for screws and hinges. A staple gun attaches fabric neatly. Measuring tape and a pencil help mark accurate cuts. Safety gear like gloves and goggles protect you while working.
Planning Your Ottoman
Planning your ottoman carefully will make the building process smoother. Good planning saves time and materials. It also ensures your ottoman looks great and works well. Think about where you will put the ottoman and what you want to store inside.
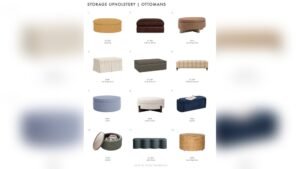
Deciding On Size And Shape
Measure the space where you want the ottoman. Choose a size that fits well without crowding the room. Think about the shape too. Square, rectangular, or round shapes each offer different styles and space uses. Pick a shape that matches your room’s style and your storage needs.
Designing Storage Space
Plan how much storage you need inside the ottoman. Decide if you want one large compartment or several small ones. Consider adding dividers to keep items organized. Think about how you will open the storage. Hinges or removable tops are good options to explore.
Sketching Your Ottoman
Draw a simple sketch of your ottoman. Include the size, shape, and storage details. Sketching helps you see the design clearly. It also guides you during building. Use your sketch to check measurements and storage layout before starting.
Cutting And Preparing Wood
Cutting and preparing wood is the first step to build a sturdy ottoman with storage. Good preparation ensures all pieces fit well. It also makes the ottoman strong and durable. Taking time to measure, cut, and finish wood carefully will save effort later.
Measuring And Marking
Measure each piece of wood twice to avoid mistakes. Use a tape measure and a pencil for marking. Mark clear lines where you will cut. Check measurements against your ottoman plan. Accurate markings make cutting easier and precise.
Cutting Panels And Frame
Use a saw suitable for your wood type. Cut along the marked lines slowly and steadily. Cut panels for the top, sides, and bottom of the ottoman. Also cut frame parts that hold the structure. Keep cuts straight to ensure all parts fit well.
Sanding And Finishing Wood
Sand all wood pieces using medium-grit sandpaper. Smooth edges and surfaces to avoid splinters. Sanding also helps paint or stain stick better. Remove dust with a clean cloth before finishing. Apply paint, stain, or sealant for protection and look.
Assembling The Ottoman Frame
Assembling the ottoman frame is the first step to create a strong base. This frame holds the shape and supports the storage box. Careful assembly ensures your ottoman lasts long and looks great.
Start by preparing all parts and tools. Follow each step carefully to join pieces tightly. A well-built frame makes the ottoman sturdy and reliable.
Joining The Base And Sides
Begin by placing the base flat on your workspace. Align the side panels at the edges of the base. Use wood glue along the edges for extra hold. Secure the sides with screws or nails. Check that all corners form right angles. Let the glue dry before moving to the next step.
Securing The Storage Box
Fit the storage box inside the frame. Make sure it fits snugly without gaps. Attach the box to the frame using screws from the inside. This prevents movement when opening or closing. Use clamps to hold the box while fixing screws. A secure box keeps items safe and hidden.
Adding Support Structures
Add extra wooden strips inside the frame for strength. Place them across the base and sides. Screw or nail these strips firmly in place. Supports stop the frame from bending or sagging. They also help the ottoman carry weight better.
Creating The Ottoman Lid
Creating the ottoman lid is a key step in making a functional storage ottoman. The lid needs to fit well and open smoothly. It should be comfortable to sit on and look good. This section explains how to build the frame, add padding, and attach hinges for the ottoman lid.
Building The Frame For The Lid
Start by cutting wood pieces for the lid frame. Use plywood or solid wood for strength. Measure the ottoman base to get the right size. Cut four pieces to form a rectangle or square. Join the pieces with wood glue and screws. Check that the frame is sturdy and fits the ottoman base.
Adding Padding And Upholstery
Cover the frame with foam padding for comfort. Cut foam to the frame size and glue it on. Use batting to smooth the edges and wrap the foam. Then, cut fabric larger than the frame. Pull the fabric tightly over the foam and staple it underneath. Make sure the fabric is smooth and wrinkle-free.
Attaching Hinges
Choose sturdy hinges for the lid. Position the hinges evenly on one side of the frame. Screw the hinges into the lid frame first. Align the lid with the ottoman base. Attach the other side of the hinges to the base. Test the lid to open and close easily without wobbling.
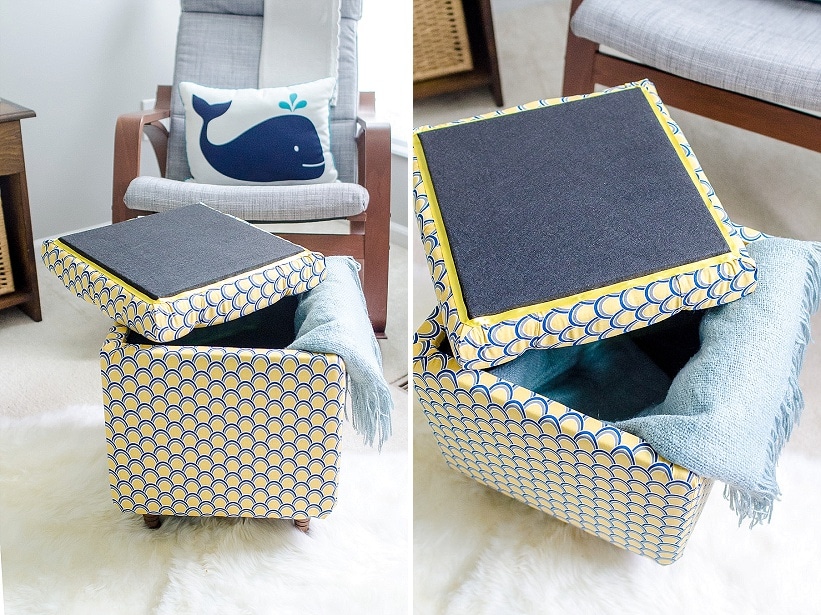
Credit: www.capitolromance.com
Upholstering The Ottoman
Upholstering the ottoman is a key step in this project. It gives the piece its style and comfort. Choosing the right fabric and attaching it well makes a big difference. Upholstery also protects the ottoman and helps it last longer.
This part is fun and creative. You can pick colors or patterns to match your room. Plus, adding decorative touches can make your ottoman unique. Let’s explore how to upholster the ottoman properly.
Cutting And Attaching Fabric
Start by measuring the ottoman’s top and sides carefully. Add extra fabric for wrapping around edges. Use sharp scissors to cut the fabric smoothly. Attach the fabric using a staple gun or strong adhesive. Pull the fabric tight to avoid wrinkles. Work slowly and check the fit as you go.
Adding Decorative Elements
Decorations can make the ottoman stand out. Try buttons or tufting for a classic look. Add trim or piping along the edges for detail. You can also use fabric glue to attach small accents. Choose decorations that match your room’s style. Keep it simple to avoid cluttering the design.
Ensuring A Tight Fit
A tight fabric fit gives a clean, polished look. Stretch the fabric evenly on all sides. Smooth out any bumps or folds. Use extra staples in corners for security. Check that the fabric does not sag over time. A snug fit helps the ottoman look professional and last longer.
Finishing Touches
The finishing touches give your ottoman a polished and complete look. They make it easier to use and move. These final steps also ensure your ottoman is sturdy and beautiful. Small details can change the entire feel of the piece. Focus on the last parts carefully for the best results.
Installing Handles Or Knobs
Handles or knobs help you open the storage space easily. Choose a style that matches your room. Measure and mark where you want them. Drill holes carefully and attach the handles or knobs securely. Tighten screws enough so they don’t wobble but avoid over-tightening.
Adding Feet Or Casters
Feet or casters lift the ottoman off the floor. Feet give a classic look and protect floors. Casters add mobility for easy moving. Pick feet or casters that support the ottoman’s weight. Attach them firmly to the bottom corners. Check they are level and stable after installation.
Final Inspection And Adjustments
Check the ottoman for any loose parts or rough edges. Test the lid to ensure it opens and closes smoothly. Look for gaps or uneven surfaces. Sand or tighten as needed. Confirm the ottoman feels strong and looks neat. Small fixes make a big difference in quality.

Credit: www.thisoldhouse.com
Maintenance Tips For Longevity
Keeping your ottoman with storage in good shape takes some care. Regular maintenance helps it last longer and look nice. A little attention now stops big problems later. Simple steps keep the fabric fresh and the wood strong. Checking parts often avoids sudden breaks. Fixing small damages early saves money and effort.
Cleaning Fabric And Wood
Clean the fabric gently with a soft brush or cloth. Use mild soap and water for stains. Avoid harsh chemicals that can damage the material. For wooden parts, dust regularly with a dry cloth. Use wood polish occasionally to keep the shine. Let the ottoman air dry fully after cleaning.
Checking Hardware Regularly
Look at screws, hinges, and handles often. Tighten any loose screws with a screwdriver. Check hinges for rust or stiffness. Oil them lightly if they squeak or feel stiff. Replace broken hardware quickly to keep the ottoman safe.
Repairing Minor Damages
Fix small tears or scratches as soon as you see them. Use fabric glue or patches for rips in upholstery. Sand lightly and apply wood filler for minor wood dents. Paint or stain the repaired spots to match the rest. Early repairs stop damage from spreading.
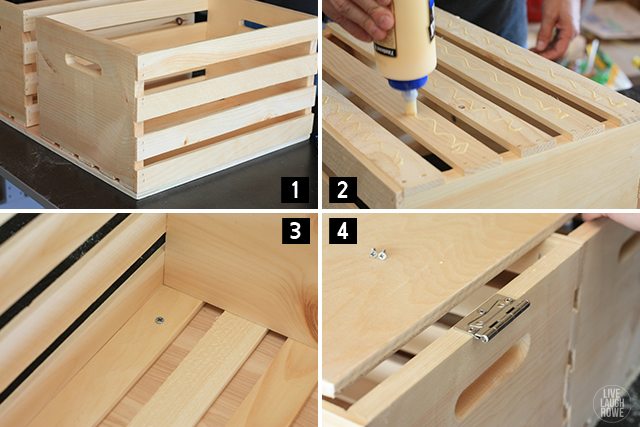
Credit: livelaughrowe.com
Frequently Asked Questions
What Materials Are Needed To Make Storage Ottomans?
To make storage ottomans, you need plywood, foam, fabric, hinges, nails, and wood glue. These materials provide a sturdy and comfortable structure with functional storage inside.
How Do You Create A Hinged Lid For Storage Ottomans?
Attach the ottoman lid with durable hinges to the base. Ensure smooth opening and closing by aligning hinges properly and securing with screws.
What Type Of Fabric Is Best For Ottoman Upholstery?
Choose durable, stain-resistant fabrics like microfiber or leather. These materials withstand daily use and add a stylish look to your storage ottoman.
How Can I Add Extra Storage Inside An Ottoman?
Use sturdy plywood to create internal compartments or dividers. This organizes items and maximizes the available storage space inside the ottoman.
Conclusion
Making ottomans with storage adds style and function to your space. You save room by hiding items inside. The project is simple and fun to try. Choose materials and colors that suit your home. Follow step-by-step instructions to build a sturdy piece.
Enjoy a comfy seat and extra storage all in one. This DIY project fits many rooms and needs. Give it a go and see the difference it makes!
As an Amazon Associate, I earn from qualifying purchases.