Struggling to remove the mophead from your spin mop? You’re not alone.
Sometimes, detaching the mophead feels tricky and frustrating, especially when you just want to clean up quickly. But don’t worry—this guide will walk you through simple, clear steps to get that mophead off without any hassle. By the end, you’ll know exactly how to handle your spin mop like a pro, saving time and effort every time you clean.
Keep reading, and make your cleaning routine easier than ever.
Prepare Your Spin Mop
Preparing your spin mop before removing the mophead is important. It helps make the process quick and safe. Proper preparation avoids damage to the mop and makes reassembly easier.
Start by gathering all tools and setting up a clean workspace. This keeps everything organized and ready. A good workspace also prevents losing small parts during removal.
Gather Necessary Tools
Collect tools like a pair of scissors, a screwdriver, or pliers. Check your spin mop manual to see what tools you need. Having these ready saves time and effort.
Use only the tools required to avoid damaging the mop. Keep tools close by for easy access. Prepare a container to hold small screws or parts.
Set Up A Clean Workspace
Choose a flat surface with good lighting to work on. Clear the area of clutter to avoid distractions. Lay down a towel or cloth to protect the mop and surface.
Ensure the space has enough room to move the mop freely. A clean workspace helps keep parts visible and prevents losing any. It also reduces dirt or dust from entering the mop parts.
Locate The Mophead Attachment
Removing the mophead from a spin mop starts with locating the attachment point. This step is important to ensure you handle the mop properly. Knowing where and how the mophead connects makes removal quick and safe. Pay close attention to the base of the mop where the head meets the handle. This area holds the key to detaching the mophead without damage.
Identify The Connection Mechanism
The mophead usually attaches with a simple mechanism. It might snap, twist, or clip onto the mop handle. Check the shape and design at the base of the mophead. Look for visible buttons, clips, or grooves. These parts help hold the mophead firmly in place. Understanding this connection helps avoid force that could break the mop.
Check For Locking Features
Some spin mops include locking features to secure the mophead. These locks prevent the mophead from falling off during use. Look for small levers or tabs near the attachment point. Press or slide these locks to release the mophead. If unsure, gently test the parts to find how they move. This step ensures a smooth and easy mophead removal.
Release The Mophead
Removing the mophead from a spin mop is simple. The first step is to release the mophead from its base. This process makes cleaning or replacing the mophead easy. Different mops use different release methods. Knowing the right way helps avoid damage and saves time.
Use The Twist-off Method
Some spin mops have mopheads that twist off. Hold the mop handle firmly. Turn the mophead counterclockwise. Keep twisting until it loosens and comes off. This method is quick and does not need tools.
Press The Release Button
Certain spin mops have a release button near the mop base. Press this button firmly. It unlocks the mophead from the handle. While pressing, gently pull the mophead down. This method is safe and easy to do.
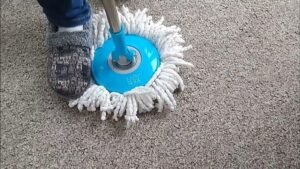
Pull The Mophead Off
Some mopheads are attached by pressure fit. Grab the mophead close to its base. Pull it straight down with a steady force. Avoid twisting in this method. Pulling removes the mophead without breaking it.

Credit: fairvu.com
Clean And Inspect The Mophead
Cleaning and inspecting the mophead is an important step. It helps keep the mop working well for a long time. Dirt and grime can build up in the mop fibers. This can make cleaning less effective. Checking the mophead also helps find damage early. You can fix or replace it before it gets worse.
Taking care of the mophead saves money. It keeps floors cleaner and makes mopping easier. Follow these simple steps to clean and inspect your mophead.
Remove Dirt And Debris
Start by removing loose dirt and debris from the mophead. Shake the mop outside to get rid of dust and hair. Use your hands or a comb to pull out stuck particles. Rinse the mophead under warm water to wash away dirt. Avoid using hot water as it can damage the fibers. Let the mophead soak for a few minutes if very dirty. This softens grime and makes cleaning easier.
Check For Wear And Tear
Look closely at the mophead for signs of wear. Check if the fibers are frayed or falling apart. Notice if the mophead feels rough or thin in some spots. These signs mean the mophead may not clean well anymore. Check if the mophead still attaches tightly to the mop handle. Loose attachments can cause problems during use. Replace the mophead if it shows heavy wear or damage. A good mophead cleans better and lasts longer.
Attach A New Mophead
Attaching a new mophead to your spin mop is simple and quick. A properly attached mophead improves cleaning and avoids damage. Follow clear steps to fit the new mophead securely. This ensures smooth spinning and effective mopping every time.
Align The Mophead Correctly
Place the mophead flat on the floor. Match the center hole of the mophead with the mop base. Make sure the mop fibers spread evenly around the base. Proper alignment helps the mop spin without wobbling. Check that the mophead fits snugly before moving to the next step.
Secure The Mophead Firmly
Press down firmly on the mop base over the mophead. You should hear a click or feel it lock in place. Test by gently pulling the mophead to confirm it stays attached. A tight fit prevents the mophead from falling off during use. Avoid loose attachment to keep cleaning efficient and safe.
Test The Spin Mop
Testing the spin mop after removing the mophead is important. It helps you know if the mop is working well. You can spot issues early and fix them fast. This step keeps your cleaning tool ready for the next use.
Check Stability
Place the mop on a flat surface. Hold the handle and see if it stands firm. The mop should not wobble or feel loose. A stable mop means the mophead is attached correctly or removed fully.
Try pressing the mop gently to check for any unusual movement. If it shakes, check the mophead or the attachment parts again. Stability keeps your cleaning smooth and easy.
Ensure Proper Spinning Action
Spin the mop handle to test the spinning mechanism. The mophead should rotate freely without sticking. Smooth spinning means the mophead was removed or fixed properly.
Listen for odd sounds like grinding or squeaking. These sounds may show parts need cleaning or adjustment. Proper spinning saves your effort and cleans better.
Tips For Maintaining Your Spin Mop
Keeping your spin mop in good condition helps it last longer and work better. Simple care steps prevent damage and save money on new parts. Focus on cleaning and storing your mop right.
These tips help you maintain your spin mop easily. They make removing the mophead smoother and keep the mop fresh for every use.
Regular Cleaning Routine
Clean the mophead after each use to avoid dirt build-up. Rinse it well with warm water until the water runs clear. Let it dry completely to stop mold and bad smells. Wash the mophead in the washing machine once a week for deep cleaning. Check the spin basket and handle for dust or debris and wipe them down.
Proper Storage Practices
Store the spin mop in a dry place to prevent rust and mold. Hang the mophead up or place it where air can reach it. Avoid leaving the mop in a bucket of dirty water. Keep the handle upright to protect the spinning mechanism. Store spare mopheads in a clean, dry spot for easy access.

Credit: www.youtube.com

Credit: www.walmart.com
Frequently Asked Questions
How Do I Detach The Mophead From A Spin Mop?
To remove the mophead, place the mop on the floor. Press the release button or twist the mophead counterclockwise. Gently pull the mophead away from the mop handle. This detaches it safely and easily for cleaning or replacement.
What Tools Are Needed To Remove A Spin Mop Mophead?
No tools are required to remove a spin mop mophead. Most spin mops use a simple twist or click mechanism. You can detach the mophead by hand quickly. This design makes maintenance easy and hassle-free.
How Often Should I Replace My Spin Mop Mophead?
Replace the mophead every 3 to 6 months. This depends on usage frequency and cleaning conditions. A worn or dirty mophead reduces cleaning efficiency. Regular replacement keeps your floors clean and hygienic.
Can I Wash The Spin Mop Mophead Before Removing It?
Yes, you can rinse the mophead before removal. This prevents dirt from spreading during detachment. Use water and mild detergent to clean the fibers. Let it dry fully before reattaching or storing.
Conclusion
Removing the mophead from a spin mop is simple with the right steps. Always hold the mop firmly and twist or pull gently. Clean the mophead regularly to keep it fresh and effective. Replacing it is quick and helps your mop work better.
Remember, a clean mop means cleaner floors. Try these easy tips for a hassle-free experience every time.
As an Amazon Associate, I earn from qualifying purchases.